• Skip to primary navigation
  • Skip to main content
  • Skip to primary sidebar

The Endless Meal®

Real Food for Busy People

Search
Main Menu
  • Latest Recipes
  • Dinner
  • Side Dishes
  • Soup
  • Salads
  • Dessert

Start Here
About
eBook

Instagram
Facebook
Pinterest
Youtube
  • 🍁 Recipes
  • Dinners
  • Cookbook
  • About
  • Start Here
Home Recipes Pie
Butter and Shortening Pie Crust on a pie

Butter and Shortening Pie Crust

Kristen Stevens
By: Kristen Stevens
Updated: 03/13/2025
5 stars (26 ratings)
10 Comments
Jump to Recipe

This post may contain affiliate links. Please read our disclosure policy.

If the taste of homemade pie crust crumbling with every buttery bite has your mouth watering, this butter and shortening pie crust has your name written all over it! It’s flaky, rich, and buttery, and the perfect envelope to deliver your favorite pie filling!

Shortening Pie Crust on a pie

This is the pie crust I reach for when flavor matters more than a picture-perfect edge. It bakes up incredibly flaky with a rich, buttery taste, and because the dough is soft and forgiving, the finished crust has a rustic, homemade look that I genuinely love. Whether I’m making apple pie, pumpkin pie, or a cozy chicken pot pie, this butter-and-shortening crust delivers every single time.

The secret is using both cold butter and cold shortening. The butter brings that unmistakable rich flavor, while the shortening creates a tender, crumbly structure that flakes beautifully in the oven. As they melt, they form little pockets of air in the dough, which give the crust its light, layered texture without any extra work or stress.

I keep the ingredient list simple: all-purpose flour forms the base, with just a touch of granulated sugar and sea salt to balance the flavor. Cold butter and cold shortening do the heavy lifting, and a small splash of white vinegar helps relax the gluten, keeping the crust tender, never tough. It’s an easy, dependable recipe that puts taste first — exactly how pie crust should be.

How to make butter and shortening pie crust

4 pictures showing how to make Butter and Shortening Pie Crust
  1. Get out the food processor and add the dry ingredients
  2. Add the good stuff – aka – add the butter and shortening.
  3. Pop the dough into a bowl and add the water and vinegar. Handle the dough as little as possible until the dough forms a rough ball.
  4. Divide the dough into 2 and wrap them in parchment paper. Then, stick them in the fridge.

How to roll out butter and shortening pie crust

4 pictures showing how to roll out Butter and Shortening Pie Crust
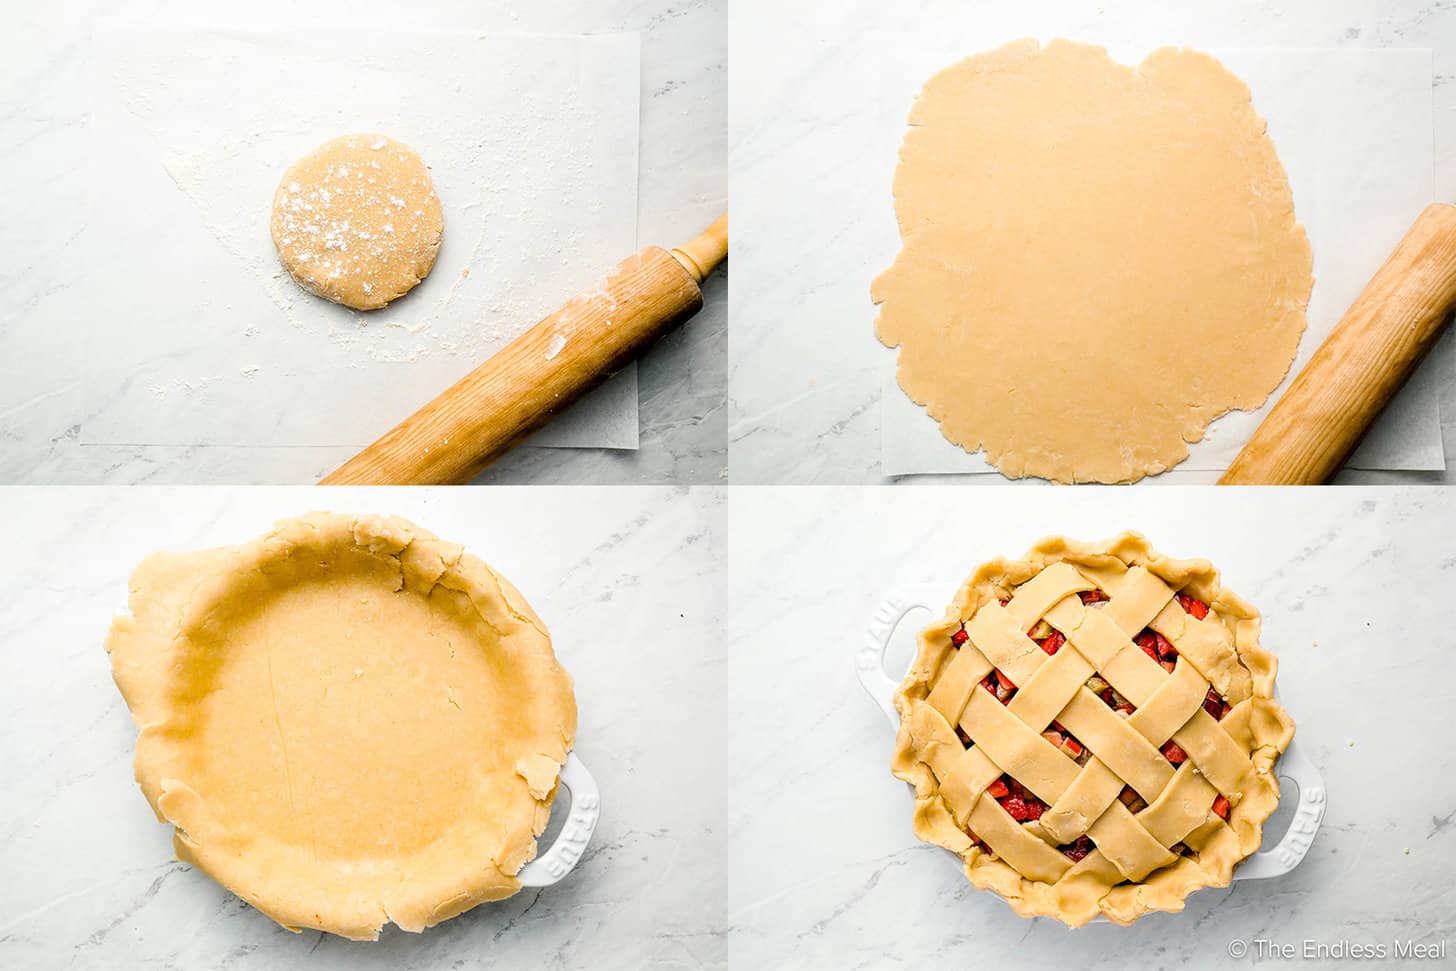
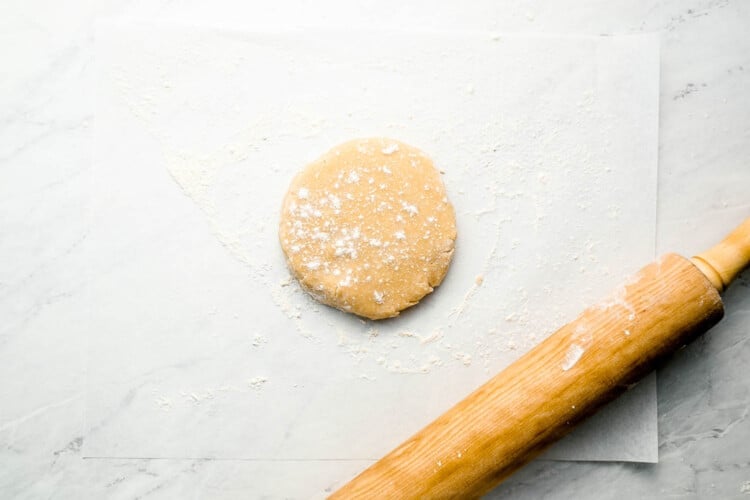
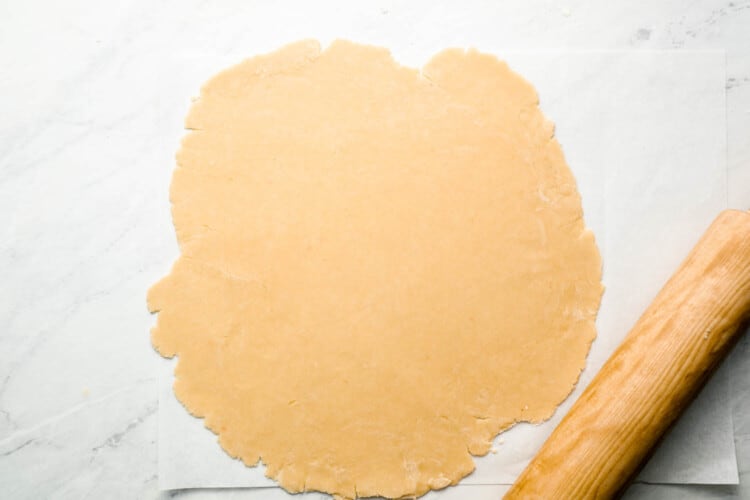
  1. On a lightly floured surface, press one of the balls of dough firmly with your palm. Sprinkle some flour on top.
  2. Get out your rolling pin and roll out a rough circle slightly larger than your pie dish.
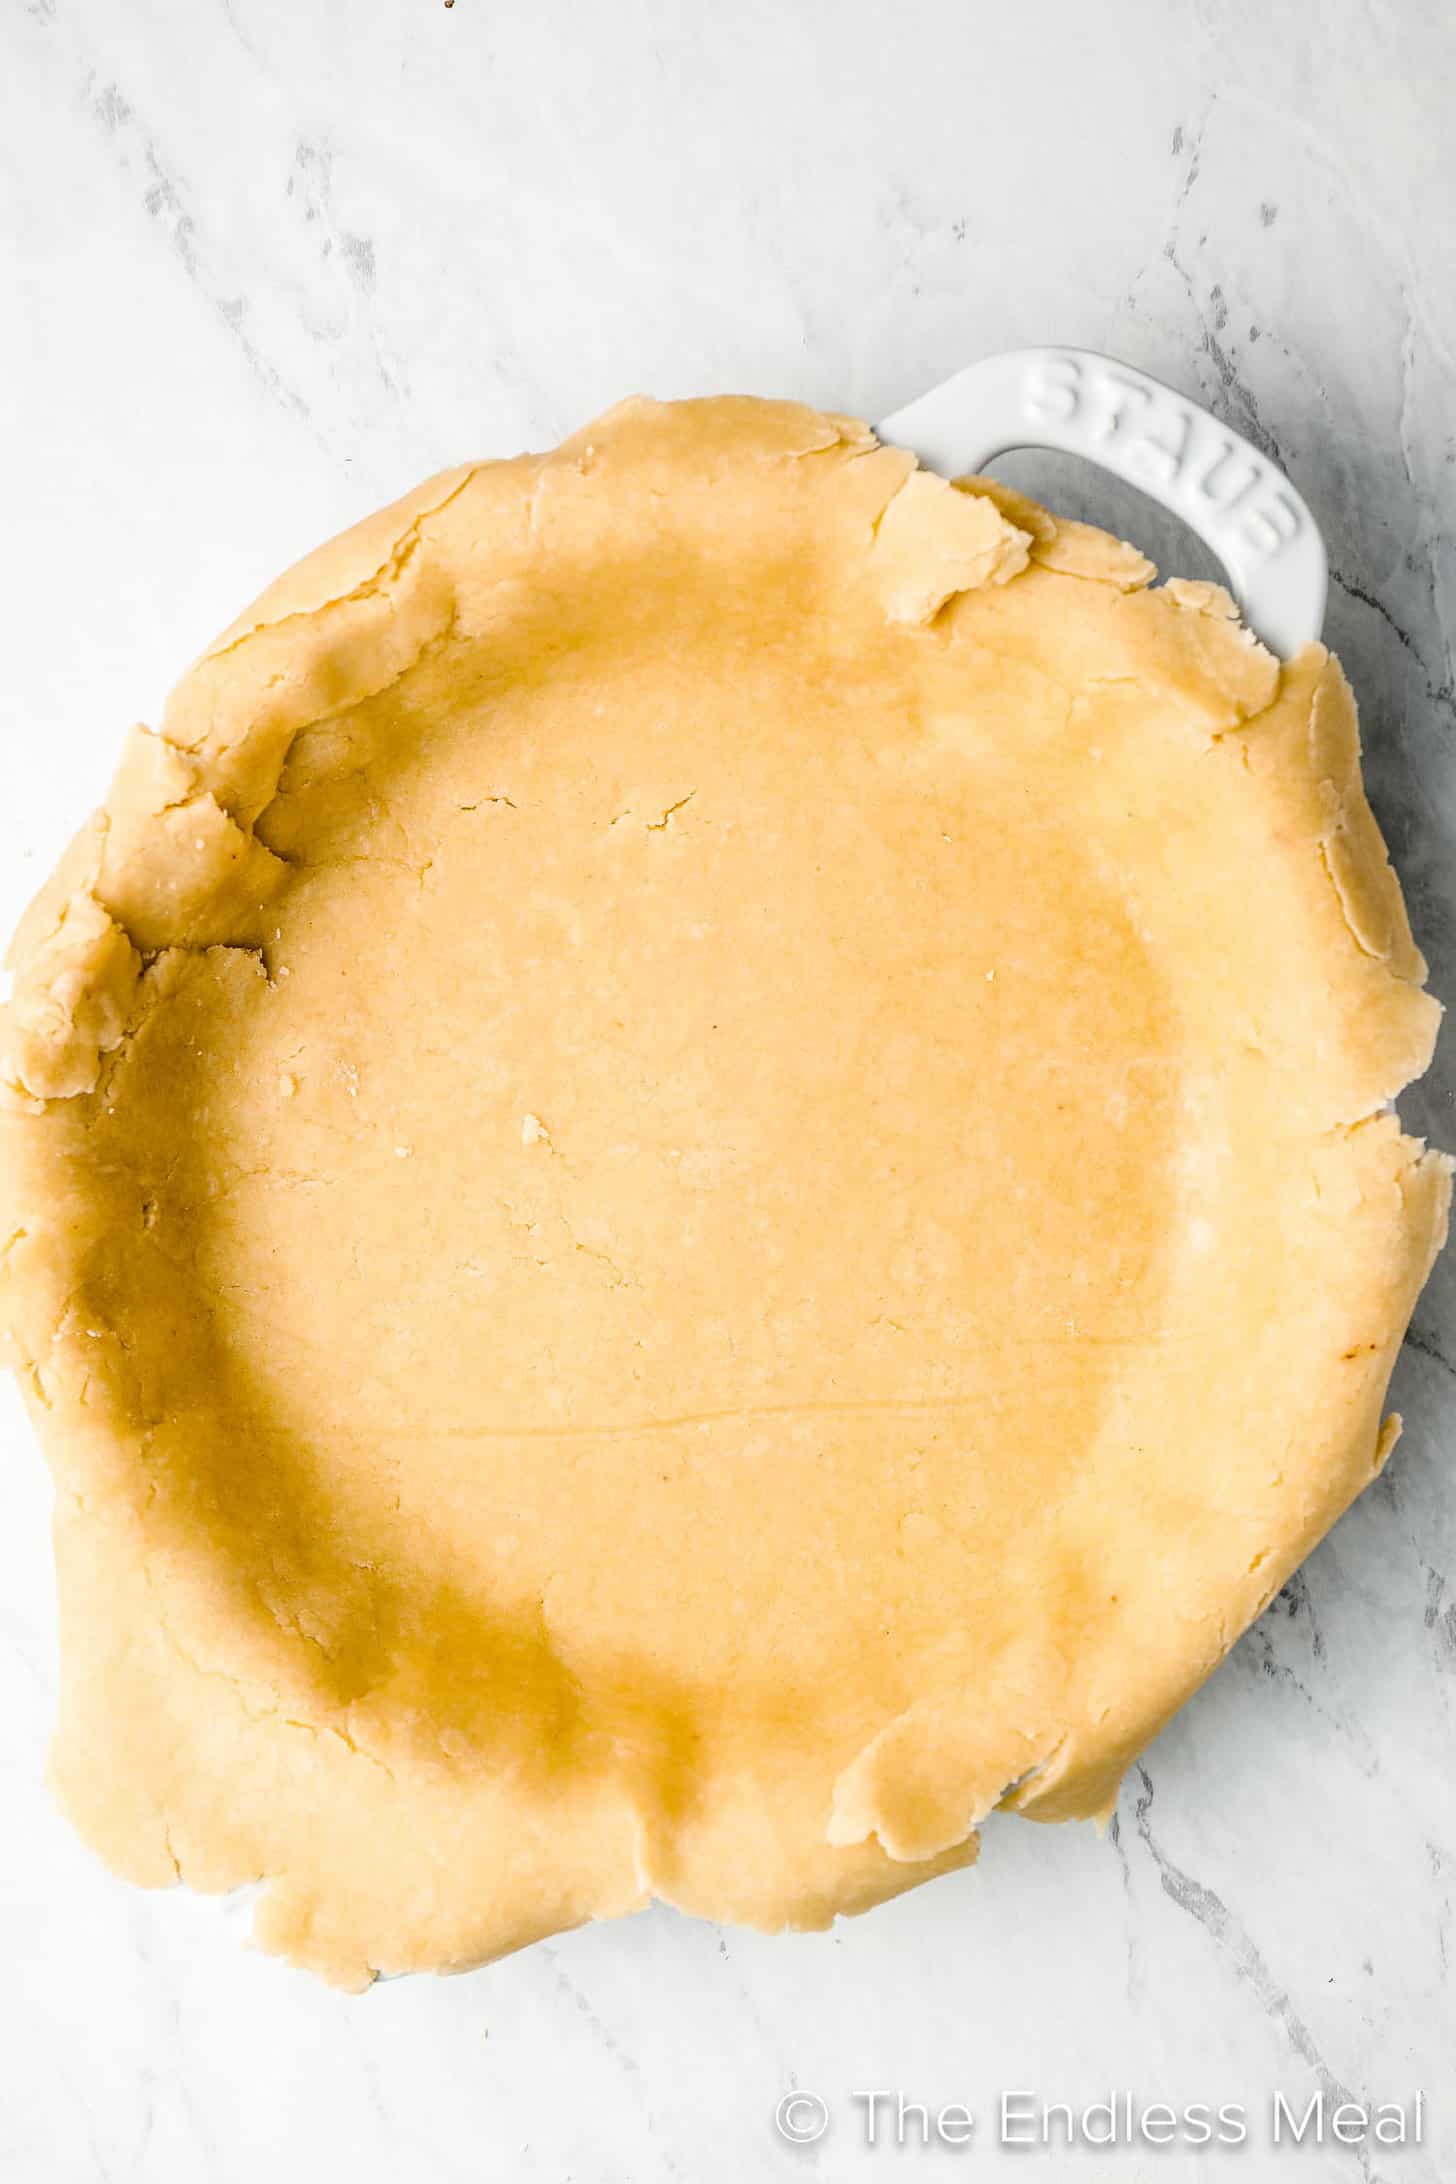
  3. This is the tricky part when making such a flaky crust. Move the pie dough to the pie dish using the parchment paper to help you slide it into place. Don’t worry if the dough cracks a little – you can simply squish it back together. Once it’s in place, pop it in the fridge.
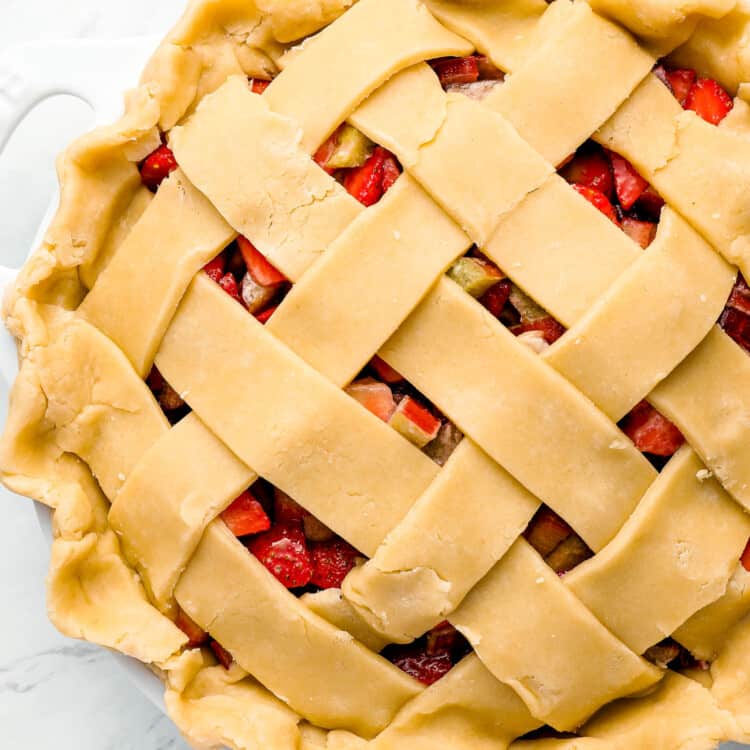
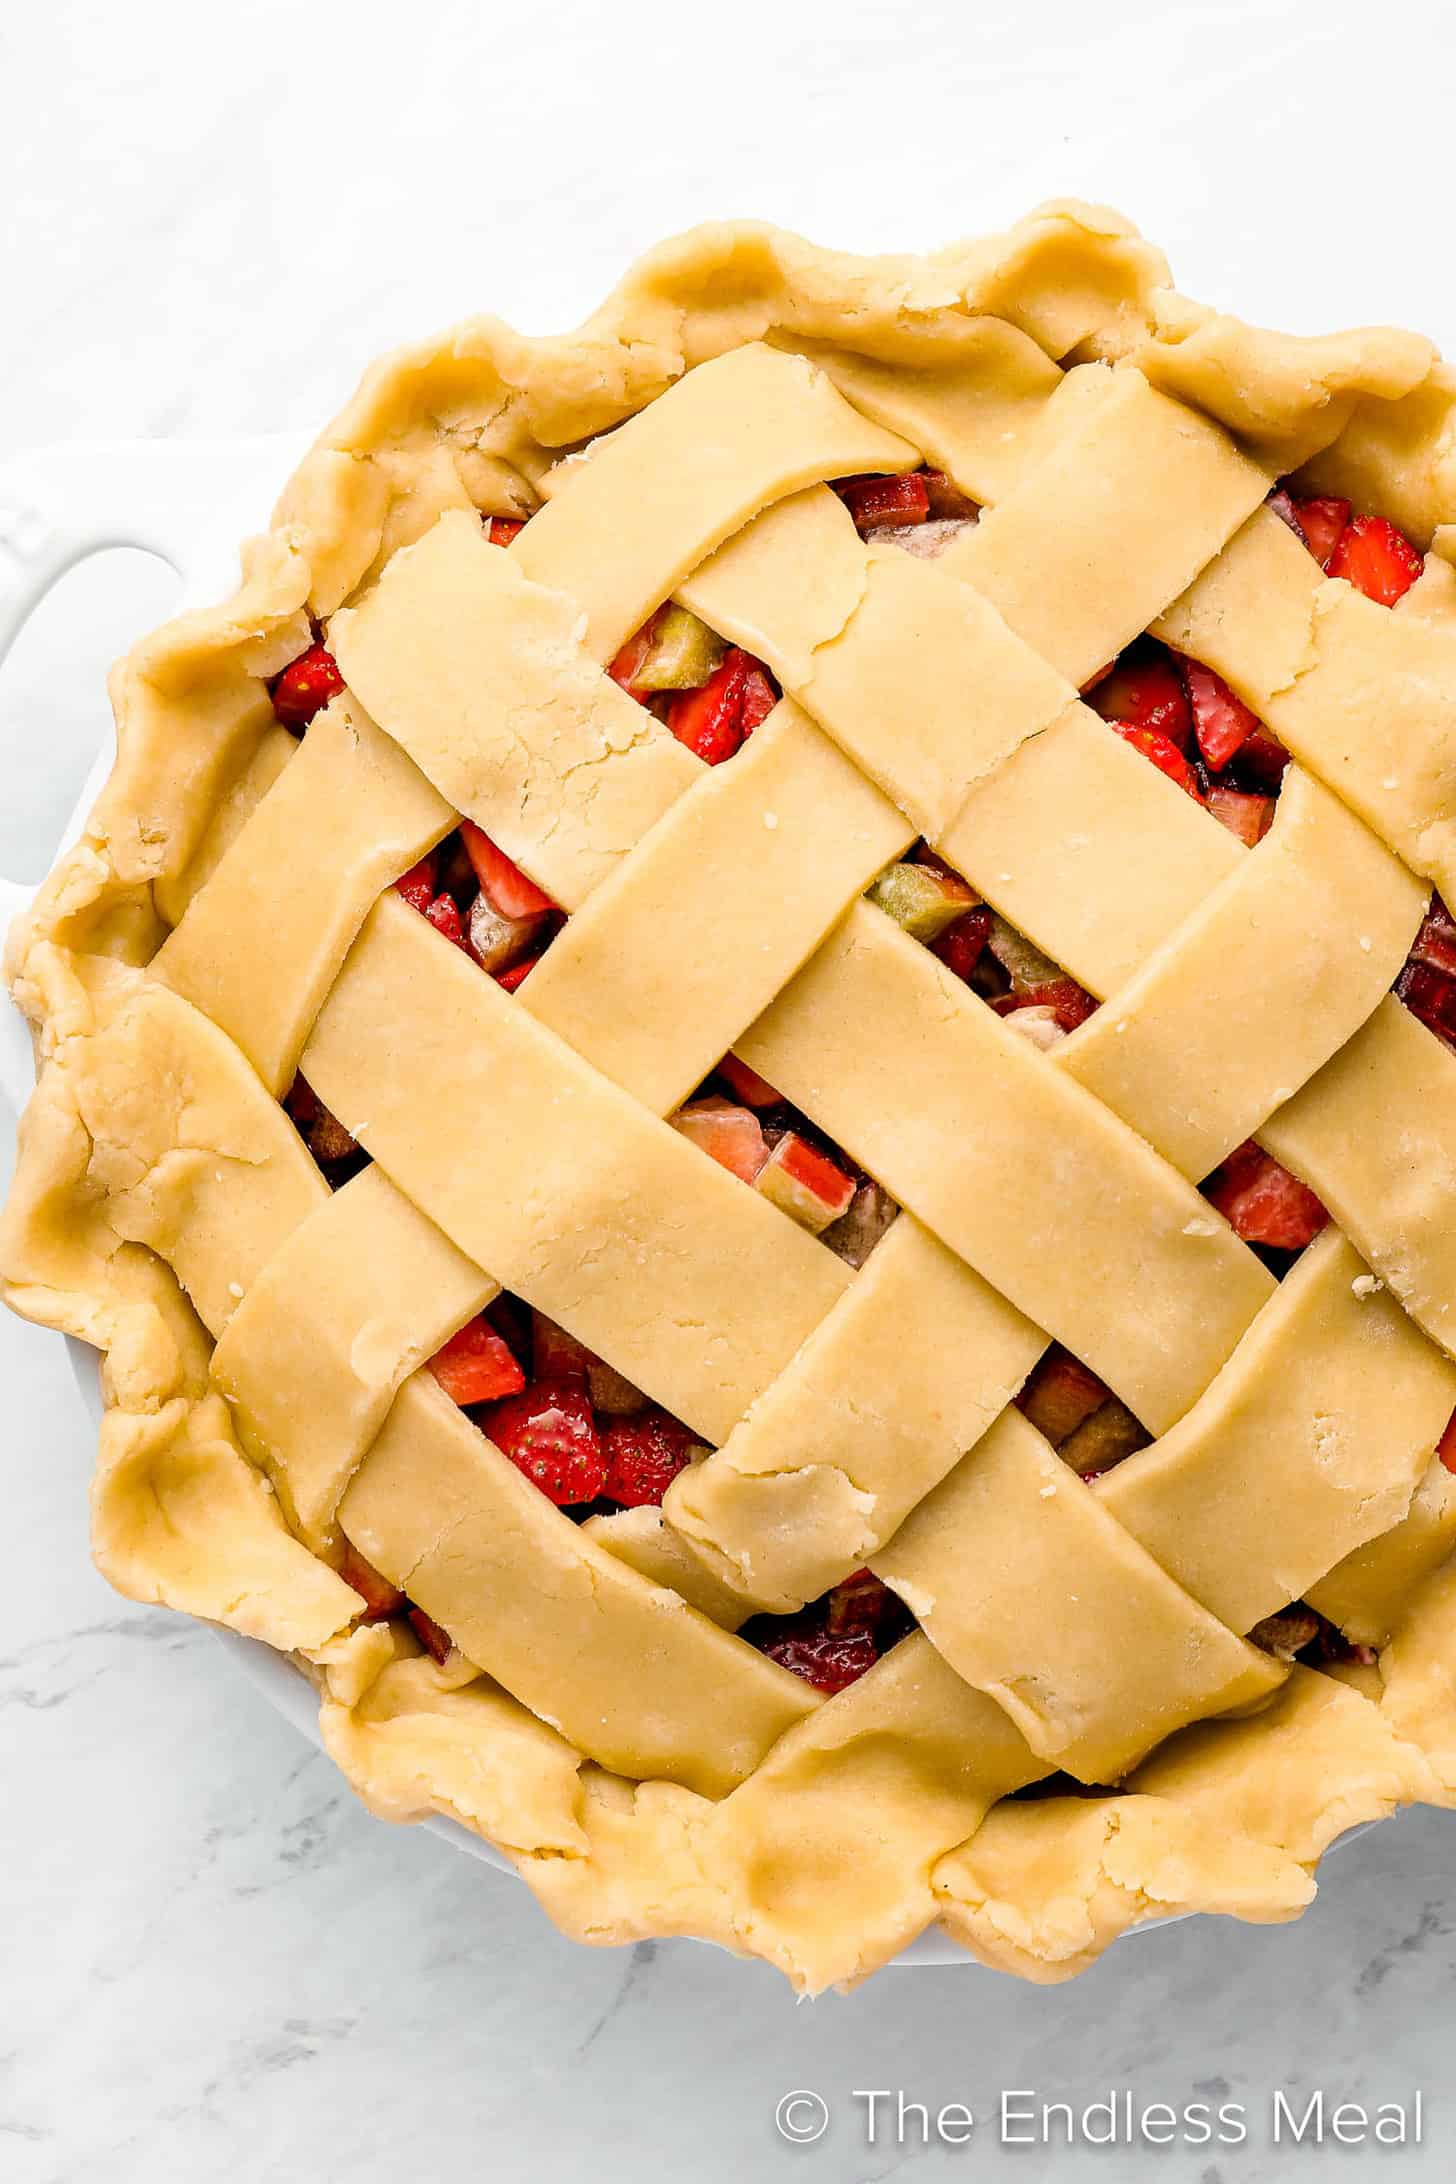
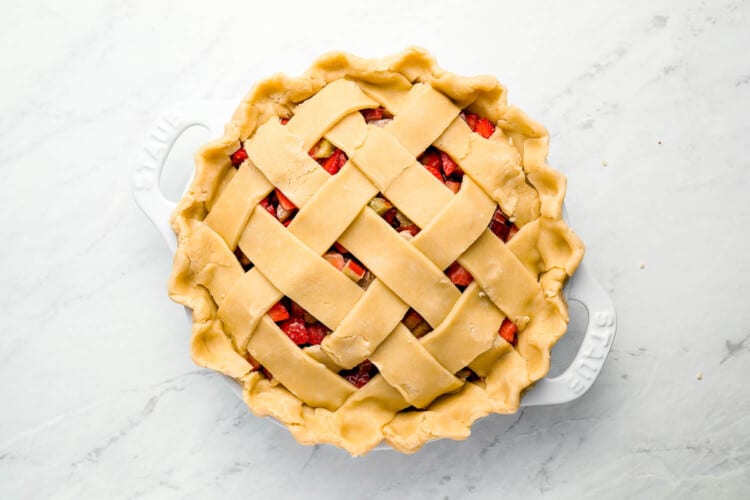
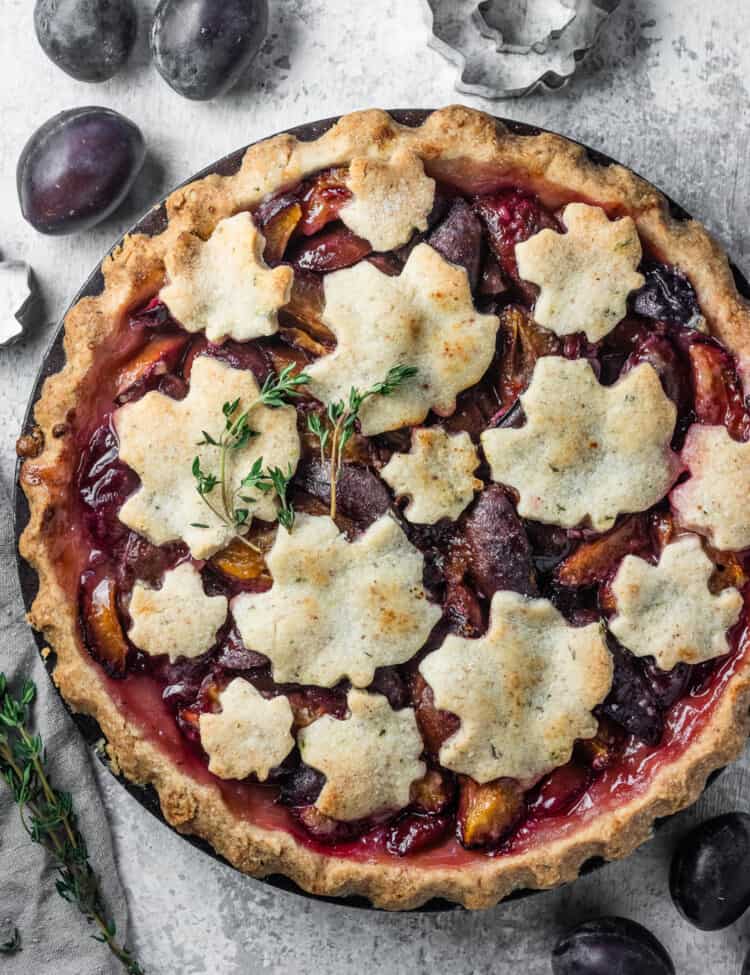
  4. Add your filling and then roll out the second ball of dough for the top. You can place it directly on top, or weave a lattice top as you see in the pictures.

Pro tips for the perfect pie crust (just like granny used to make)

This recipe is adapted from the pie crust my granny used to make, and it’s one I’ve been baking and refining for years. Everything I know about this shortening pie crust comes straight from her, and these are the tried-and-true tips she swore by.

  1. The biggest rule with pie crust is keeping everything cold. I try to handle the dough as little as possible so my hands don’t warm it up.
  2. I always use cold butter and cold shortening because, as they melt in the oven, they create tiny air pockets that give the crust its signature flaky texture.
  3. Once the dough is shaped and in the pie dish, I let it rest in the refrigerator. This keeps the fat cold and gives the gluten in the flour time to relax, which helps prevent a tough crust.
  4. When it’s time to bake, I often use a pie shield or a bit of aluminum foil around the edges so the crust browns evenly without overdoing it.

Recipe FAQs

Can I use bacon fat in the pie crust?

Yes! When we want to get crazy, we substitute a little bacon fat for some of the shortening. It adds a bit of extra flavor, and it makes the crust even flakier. Just be careful not to add too much bacon fat, as you will taste it. We’ve found that 1 tablespoon is the perfect amount.

Can I use all shortening to make a pie crust?

You can, but we don’t recommend it. While it will have the most wonderful flaky texture, it will taste pretty bland. That’s why we recommend both butter and shortening to get the best results of each.

Can I freeze the pie dough?

Definitely! If it’s wrapped tightly, it can last for up to 6 months in the freezer.

Tap stars to rate!
5 stars (26 ratings)
Butter and Shortening Pie Crust on a pie

Butter and Shortening Pie Crust Recipe

Prep: 30 minutes mins
Chilling Time: 30 minutes mins
Total: 1 hour hr
Rate Recipe Print
SaveSaved!
Add us as a preferred source
If the taste of homemade pie crust crumbling with every buttery bite has your mouth watering, this butter and shortening pie crust has your name written allllll over it! It's flaky, with a rich, buttery flavor and it's the perfect envelope to deliver your favorite pie filling!
12

Ingredients

  • 3 cups all-purpose flour
  • 2 tablespoons granulated sugar
  • ½ teaspoon sea salt
  • ¾ cup butter (cold)
  • ½ cup shortening (cold)
  • 1 teaspoon apple cider vinegar (or white vinegar)
  • 1-3 teaspoons cold water

Instructions 

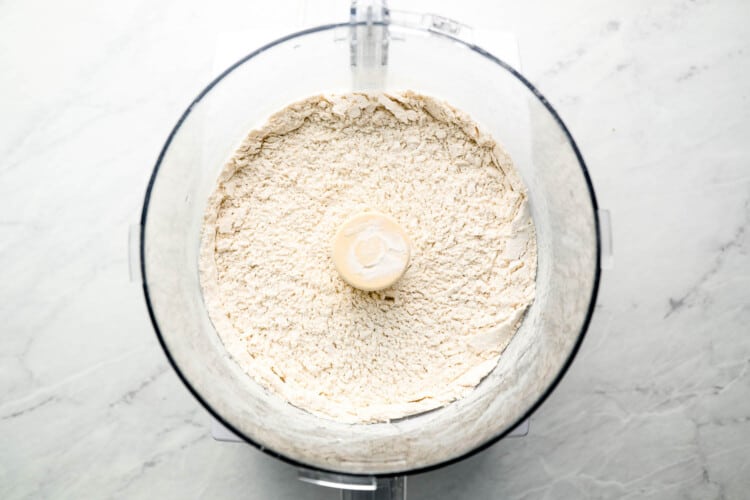
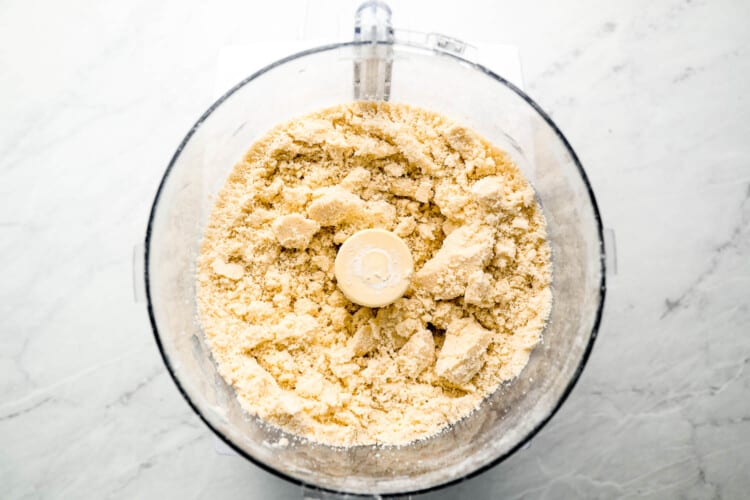
  • Combine the flour, sugar, and sea salt in the bowl of a food processor and pulse to combine.
    3 cups all-purpose flour, 2 tablespoons granulated sugar, ½ teaspoon sea salt
    image for recipe instruction
  • Add the shortening and butter and pulse to combine. The dough should look a little like wet sand at this point.
    ¾ cup butter, ½ cup shortening
    image for recipe instruction
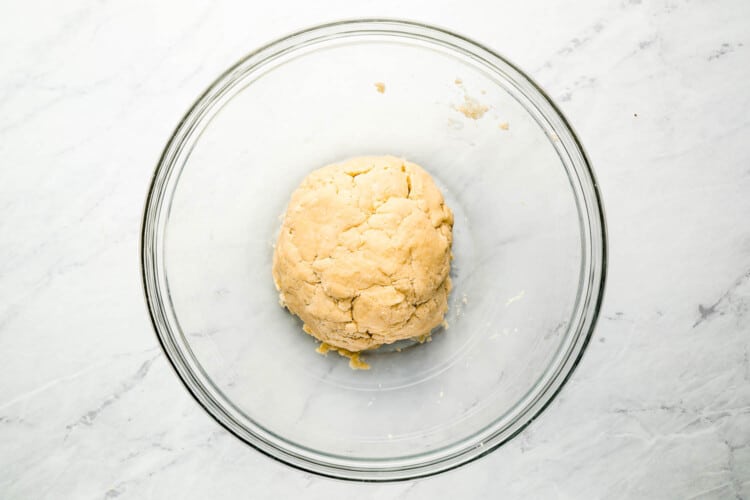
  • Transfer the dough to a large bowl and add the vinegar and 1 teaspoon of cold water. Working with just the tips of your fingers, combine everything just until the dough forms a ball, adding more cold water if needed.
    1 teaspoon apple cider vinegar, 1-3 teaspoons cold water
    image for recipe instruction
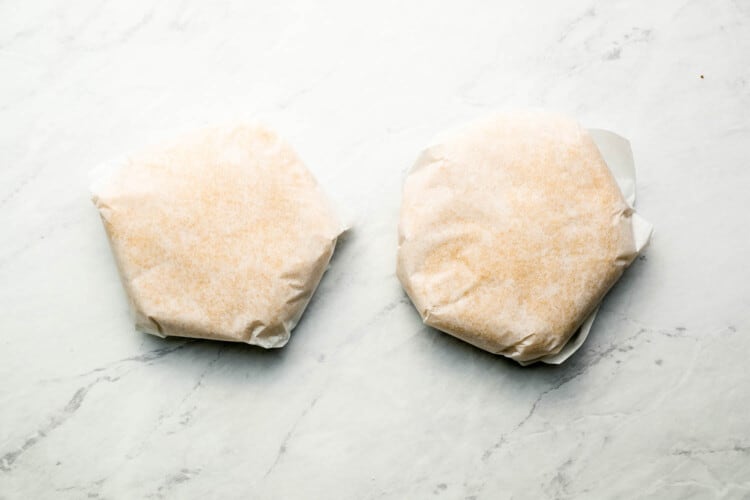
  • Divide the dough into 2 balls, wrap the balls in parchment paper, and place them into the fridge for at least a half hour, or up to 2 days. (If you are making a lattice top, like in the pictures, make one ball slightly larger than the other.)
    image for recipe instruction
  • Take one ball of dough out of the fridge, remove the parchment paper, and place it on a piece of lightly floured parchment paper. Press it down with the heel of your palm and dust it lightly with flour.
    image for recipe instruction
  • Use a rolling pin to roll the dough into a rough circle about 2 inches larger than your pie pan. If the dough starts to crack at the edges of the circle use your fingers to squish it back together.
    image for recipe instruction
  • Pick the dough up using the parchment paper (our extra flaky dough is quite soft and a bit tricky to pick up) and use it to guide the dough into the pie pan. Place the pie pan into the fridge.
    image for recipe instruction
  • Fill your pie with your desired filling and then roll out the second pie crust and place it on top. You can also cut strips to make a lattice top. Crimp the edges of the dough together. See notes for baking recommendations.
    image for recipe instruction

Notes

Every pie bakes a little differently, so it is best to follow the directions in the pie recipe you are using. But if you are making your own pie filling, bake the pie for 15 minutes at 400 degrees Fahrenheit, then reduce the oven to 350 degrees Fahrenheit and continue baking for another 30-40 minutes, until the filling is hot and bubbling and the crust is golden. TIP: Cover the edges of the pie with aluminum foil or a pie shield if the crust is browning too quickly. 

Nutrition

Serving: 1 slice (of 12), Calories: 299kcal (15%), Carbohydrates: 26g (9%), Protein: 3g (6%), Fat: 20g (31%), Saturated Fat: 9g (56%), Polyunsaturated Fat: 3g, Monounsaturated Fat: 7g, Trans Fat: 2g, Cholesterol: 31mg (10%), Sodium: 189mg (8%), Potassium: 37mg (1%), Fiber: 1g (4%), Sugar: 2g (2%), Vitamin A: 355IU (7%), Calcium: 8mg (1%), Iron: 1mg (6%)
© Author Kristen Stevens

We have thoroughly tested this recipe for accuracy. However, individual results may vary. See our full recipe disclosure here.

Butter and Shortening Pie Crust on a pie

Did you make this?

We love to see what you made! Tag @theendlessmeal or hashtag #theendlessmeal!

Tag us on Instagram
Rate Recipe
Butter and Shortening Pie Crust rolled out
Butter and Shortening Pie Crust rolled out and in a pie pan

Favorite pie recipes

An Easy Peach Pie sliced into pieces
1 hour hr 5 minutes mins

Easy Peach Pie

A close up of a slice of this easy chocolate pie recipe
50 minutes mins

Easy Chocolate Pie (restaurant-quality made at home)

A prune plum pie decorated fro autumn
1 hour hr 25 minutes mins

Prune Plum Pie with Almond Thyme Crust

Homemade Cherry Pie on a table next to fresh cherries
1 hour hr 20 minutes mins

Easy Homemade Cherry Pie

All pie recipes

98 shares
  • Facebook
  • Email
Kristen Stevens

Kristen Stevens

Hi, I'm Kristen! I LOVE everything to do with food: making it, taking pictures of it, and (the best part) eating it. ♡♡♡

Learn More
Posted: 08/23/2023 Updated: 03/13/2025
guest
Rate this recipe:


guest
Rate this recipe:


10 Comments
Inline Feedbacks
View all comments
Madame
Madame

5 stars
Hi! I’m a novice crust-maker.. Can you please post a video of step 3? I believe crusts aren’t to be over-worked so I’m not sure what step 3 should look like..

0
Reply
Kristen Stevens
Kristen Stevens
Reply to  Madame

For step 3 you just want to work it enough to shape it into a ball. The most important thing is that you want the dough cold before it goes into the oven, so just make sure of that and it will turn out just fine!

0
Reply
Michael L.
Michael L.

5 stars
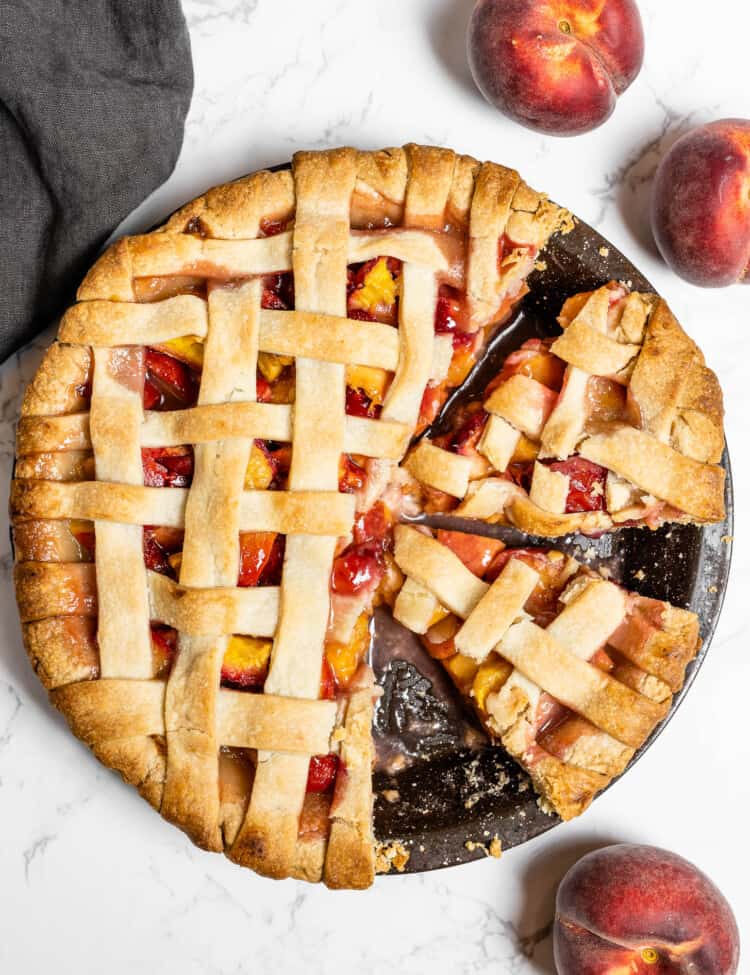
This pie crust is to die for! I used this recipe to make pie crusts for my peach pie. We had fresh tree ripened peaches for the filling, which was delicious on its own. This crust was so crispy, flaky, and delicious that we had to have a second slice of pie immediately after eating the first slice!! The bottom crust was crispy and flaky, not doughy or tough, and held together under the peach filling.
I did reduce the vegetable shortening by 1 tablespoon and added a tablespoon of bacon lard. I also cut the butter and shortening into 1/4 inch cubes and put them into the freezer for 30 minutes before blending into the flour, to ensure that they stayed cold.
I’ve saved this recipe to have for future pies!!!

0
Reply
Kristen Stevens
Kristen Stevens
Reply to  Michael L.

I’m thrilled that you love this recipe! And a little bacon fat is always a good idea!!

0
Reply
Nathan
Nathan

5 stars
It’s been a long time since I made my own pie crust–I tend to find homemade ones a bit difficult to work with. This recipe was easy, so I can’t wait to make it again!

0
Reply
Julie C.
Julie C.

5 stars
I added this recipe to my cookbook to enjoy when making all the delicious pies this upcoming fall season!

0
Reply
Juliw
Juliw

I would have appreciated if you had included how much water to use.

0
Reply
Kristen Stevens
Kristen Stevens
Reply to  Juliw

Thank you for pointing that out! I’ve updated the recipe. It should be 1-3 teaspoons of cold water. I always start with 1 teaspoon and add more as needed.

0
Reply
JerseyGirl
JerseyGirl
Reply to  Kristen Stevens

3 teaspoons of water? That is one tablespoon. You add one tablespoon of water to 3 cups of flour and your crust holds together? You don’t mean 3 tablespoons of water?

1
Reply
Kristen Stevens
Kristen Stevens
Reply to  JerseyGirl

Teaspoons is correct. From my experience, pie dough with shortening needs less water than all butter dough.

0
Reply

sidebar

Welcome!

Hi, I'm Kristen Stevens

I’m a self-taught chef, food photographer, and author of the cookbook Sugar Free Dinner Recipes. Since 2011, I have been sharing my well-tested and approachable recipes, helping home cooks like you feel comfortable and confident in the kitchen. My work has been featured in Food & Wine, Pioneer Woman, The Every Girl, Self, and many more. Let’s have some fun cooking together!

Learn more!

Trending

Parmesan Crusted Carrots on a baking tray.
35 minutes mins

Parmesan Crusted Carrots (The Viral Recipe!)

A thin pork chop on a dinner plate with mashed potatoes and peas.
16 minutes mins

How to Cook Thin Pork Chops (with delicious honey garlic butter)

Baked BBQ Salmon in a dinner bowl
20 minutes mins

Baked BBQ Salmon with Buttery Corn Rice

My favorite Ground Beef Chili in a bowl with toppings.
2 hours hrs 10 minutes mins

Ground Beef Chili (the recipe everyone asks for!)

Seasonal

4 pieces of tender salmon with creamy lemon dill sauce
20 minutes mins

Baked Salmon with Creamy Lemon Dill Sauce

Baked Ziti with sausage on the dinner table
55 minutes mins

Baked Ziti with Sausage (in tomato sauce topped with pesto)

A skillet featuring Coq au Vin-style chicken drumsticks with bacon, mushrooms, onions, and herbs in a rich sauce.
1 hour hr 15 minutes mins

Julia Child’s Coq au Vin

A bowl of cheesy tomato orzo topped with Parmesan Chicken Meatballs
30 minutes mins

Parmesan Chicken Meatballs with Cheesy Tomato Orzo

As seen on:

A bowl of lentil stew with white rice and naan bread, overlaid with text: 10 Big Flavor Simple Dinners with healthier ingredients from The Endless Meal.
Get the e-book

10 Big Flavor Dinner Simple Dinners

Get now!

Explore Recipes

Lemon Baked Fish
Garlic Soup
Steak Salad
Kale Dressing
Hot Honey
Fish Curry
Turkey Soup
Chicken Marinade
Bacon Jam

Instagram
Facebook
Pinterest
Youtube
Back To Top

FAQ
Contact
Privacy Policy
Disclaimers
Accessibility
© 2026 The Endless Meal® All Rights Reserved.
Site Credits
Designed by Melissa Rose Design Developed by Once Coupled
wpDiscuz

Rate This Recipe

Your vote:


Let us know what you thought of this recipe:

This worked exactly as written, thanks!
My family loved this!
Thank you for sharing this recipe

Or write in your own words:

A rating is required
A name is required
An email is required