
Easy Homemade Cherry Pie
This post may contain affiliate links. Please read our disclosure policy.
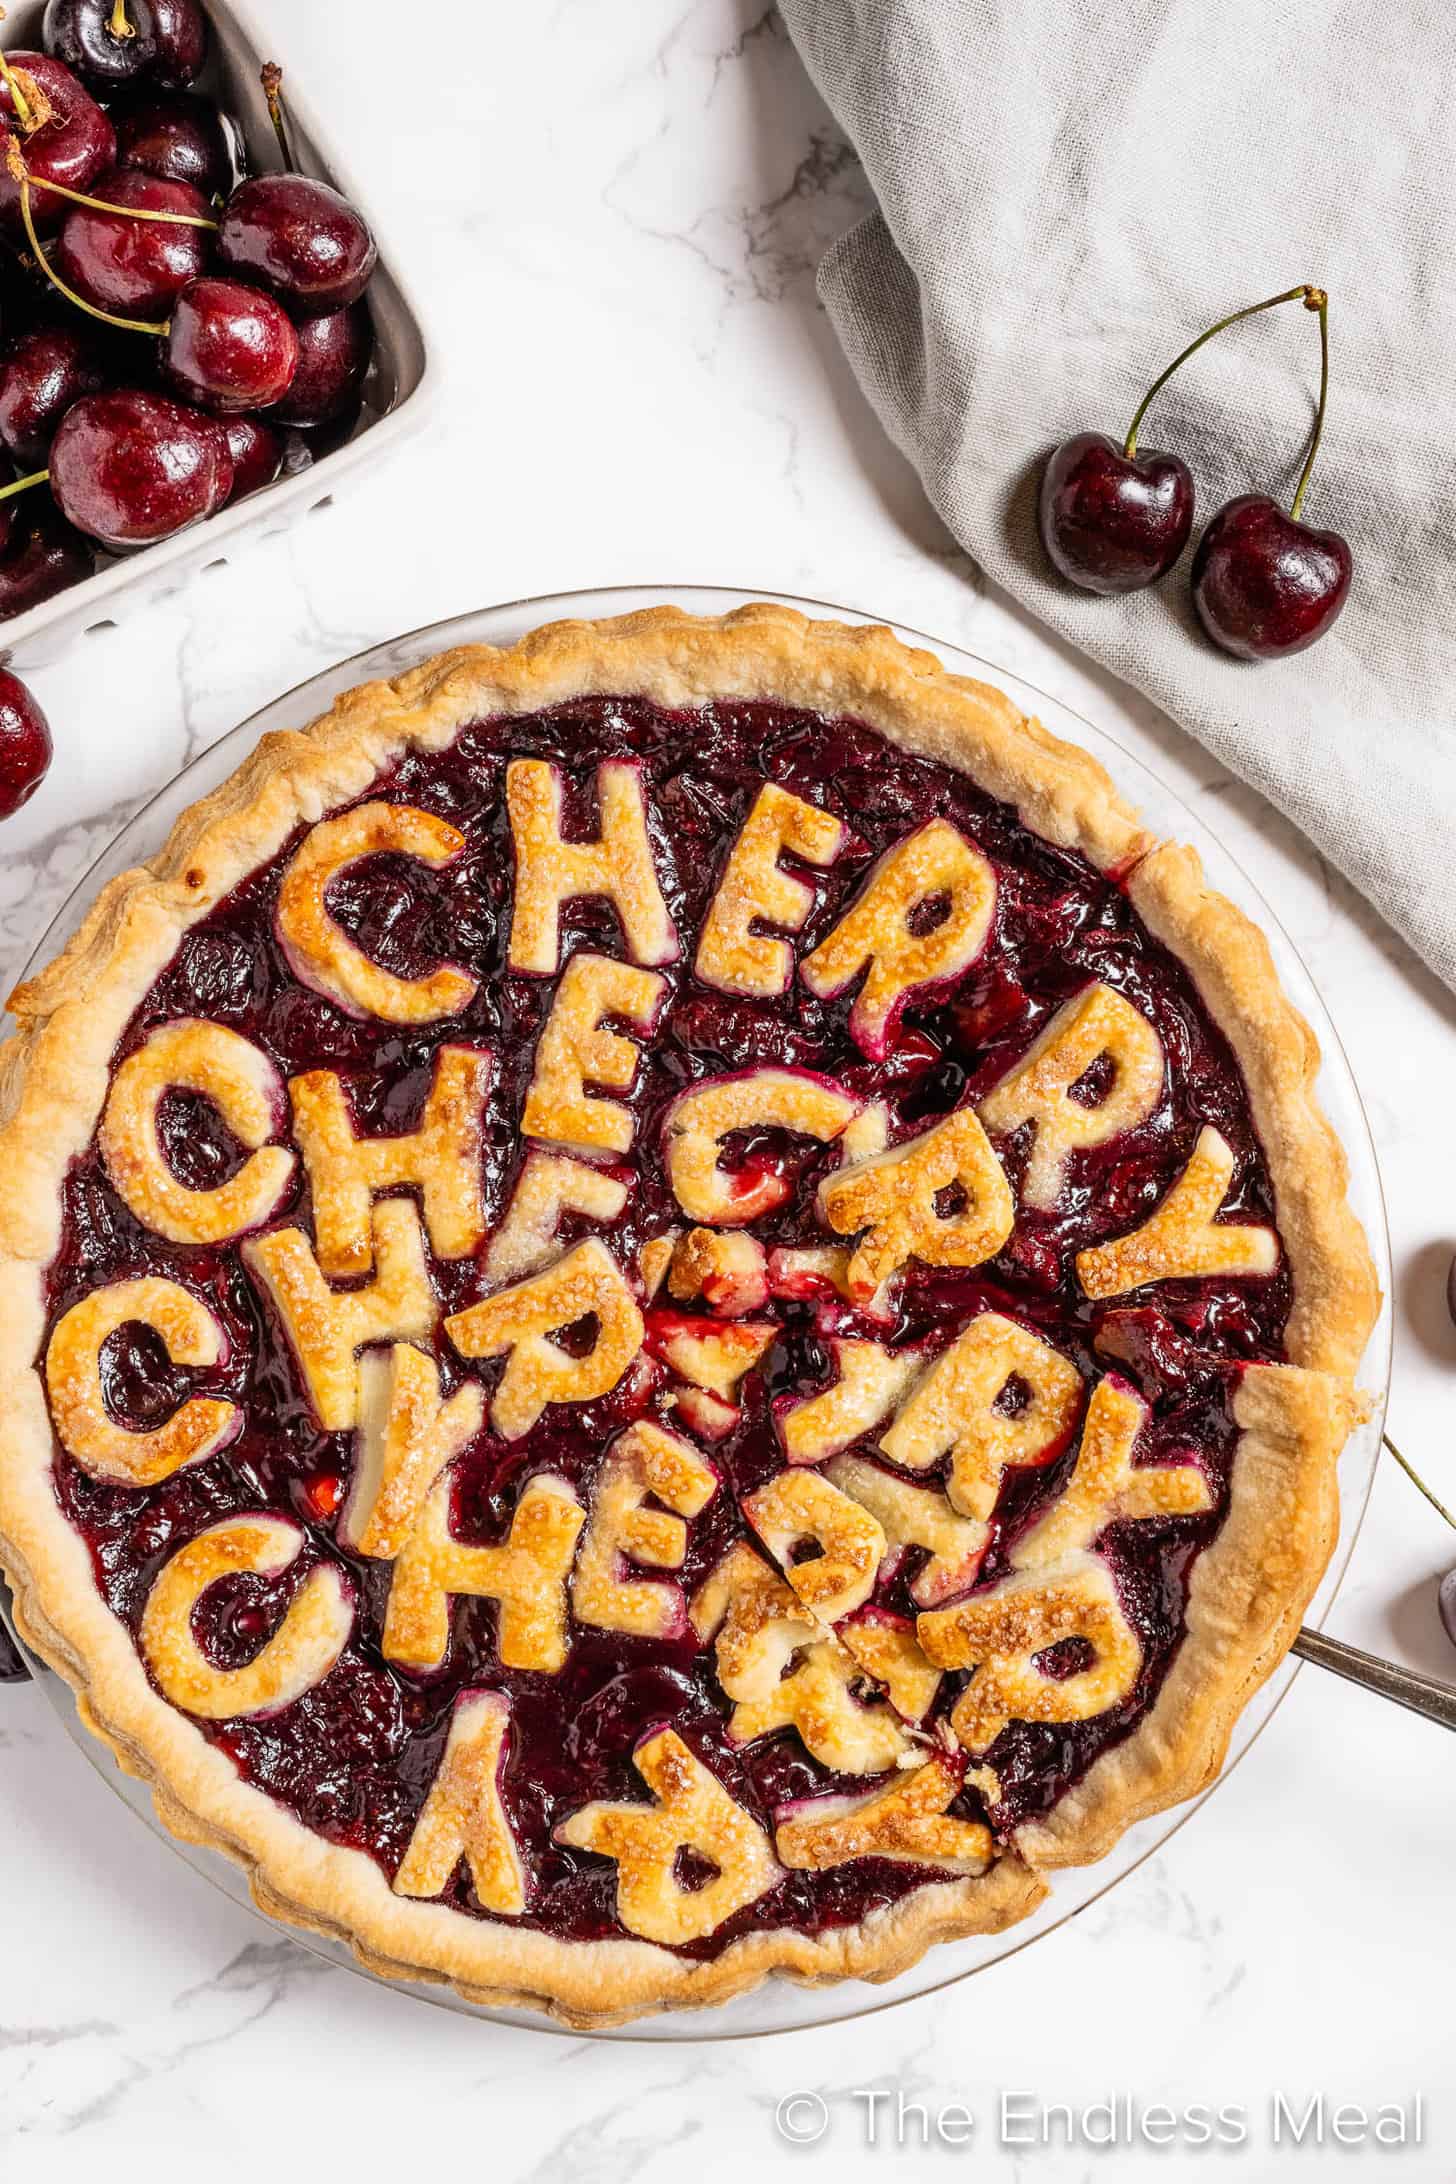
When developing this cherry pie recipe, I knew I wanted the cherry filling to be thick and jammy and full of fresh cherry flavor. Simmering the cherries for a few minutes before filling the pie ensures that the consistency and flavor are spot on. You can get playful and write the word ‘cherry’ on top in pie dough, or cover it for a more traditional look.
Homemade pie isn’t just for grandmothers or people with endless time anymore. I make this homemade cherry pie whenever cherries are in season because it’s truly easy as pie: about 30 minutes of prep, then the oven takes over. The result is a classic, buttery cherry pie that feels special without being fussy.
To make it, I start with one double pie crust, either homemade or store-bought. You’ll need about 2 pounds of cherries, washed, stemmed, and pitted, which bake down into a juicy, vibrant filling. Granulated sugar adds just the right amount of sweetness, while cornstarch thickens the cherries into that glossy, sliceable texture you want in a good pie. I like to add a tablespoon of amaretto for a subtle almond note, though vanilla extract works just as well. For a golden, bakery-style finish, I sometimes brush the top crust with an egg mixed with a splash of water, but that step is optional.
This is the kind of pie that proves homemade doesn’t have to be complicated—and once you try it, you’ll see just how doable (and rewarding) it really is.

Pro tips for the perfect homemade cherry pie
- When you’re baking the pie, put a pie shield on the crust after the first 15 minutes to prevent the edges from getting too brown. If you don’t have a pie shield, you can make one using aluminium foil. Just remember you don’t want to cover the pie, just the edges.
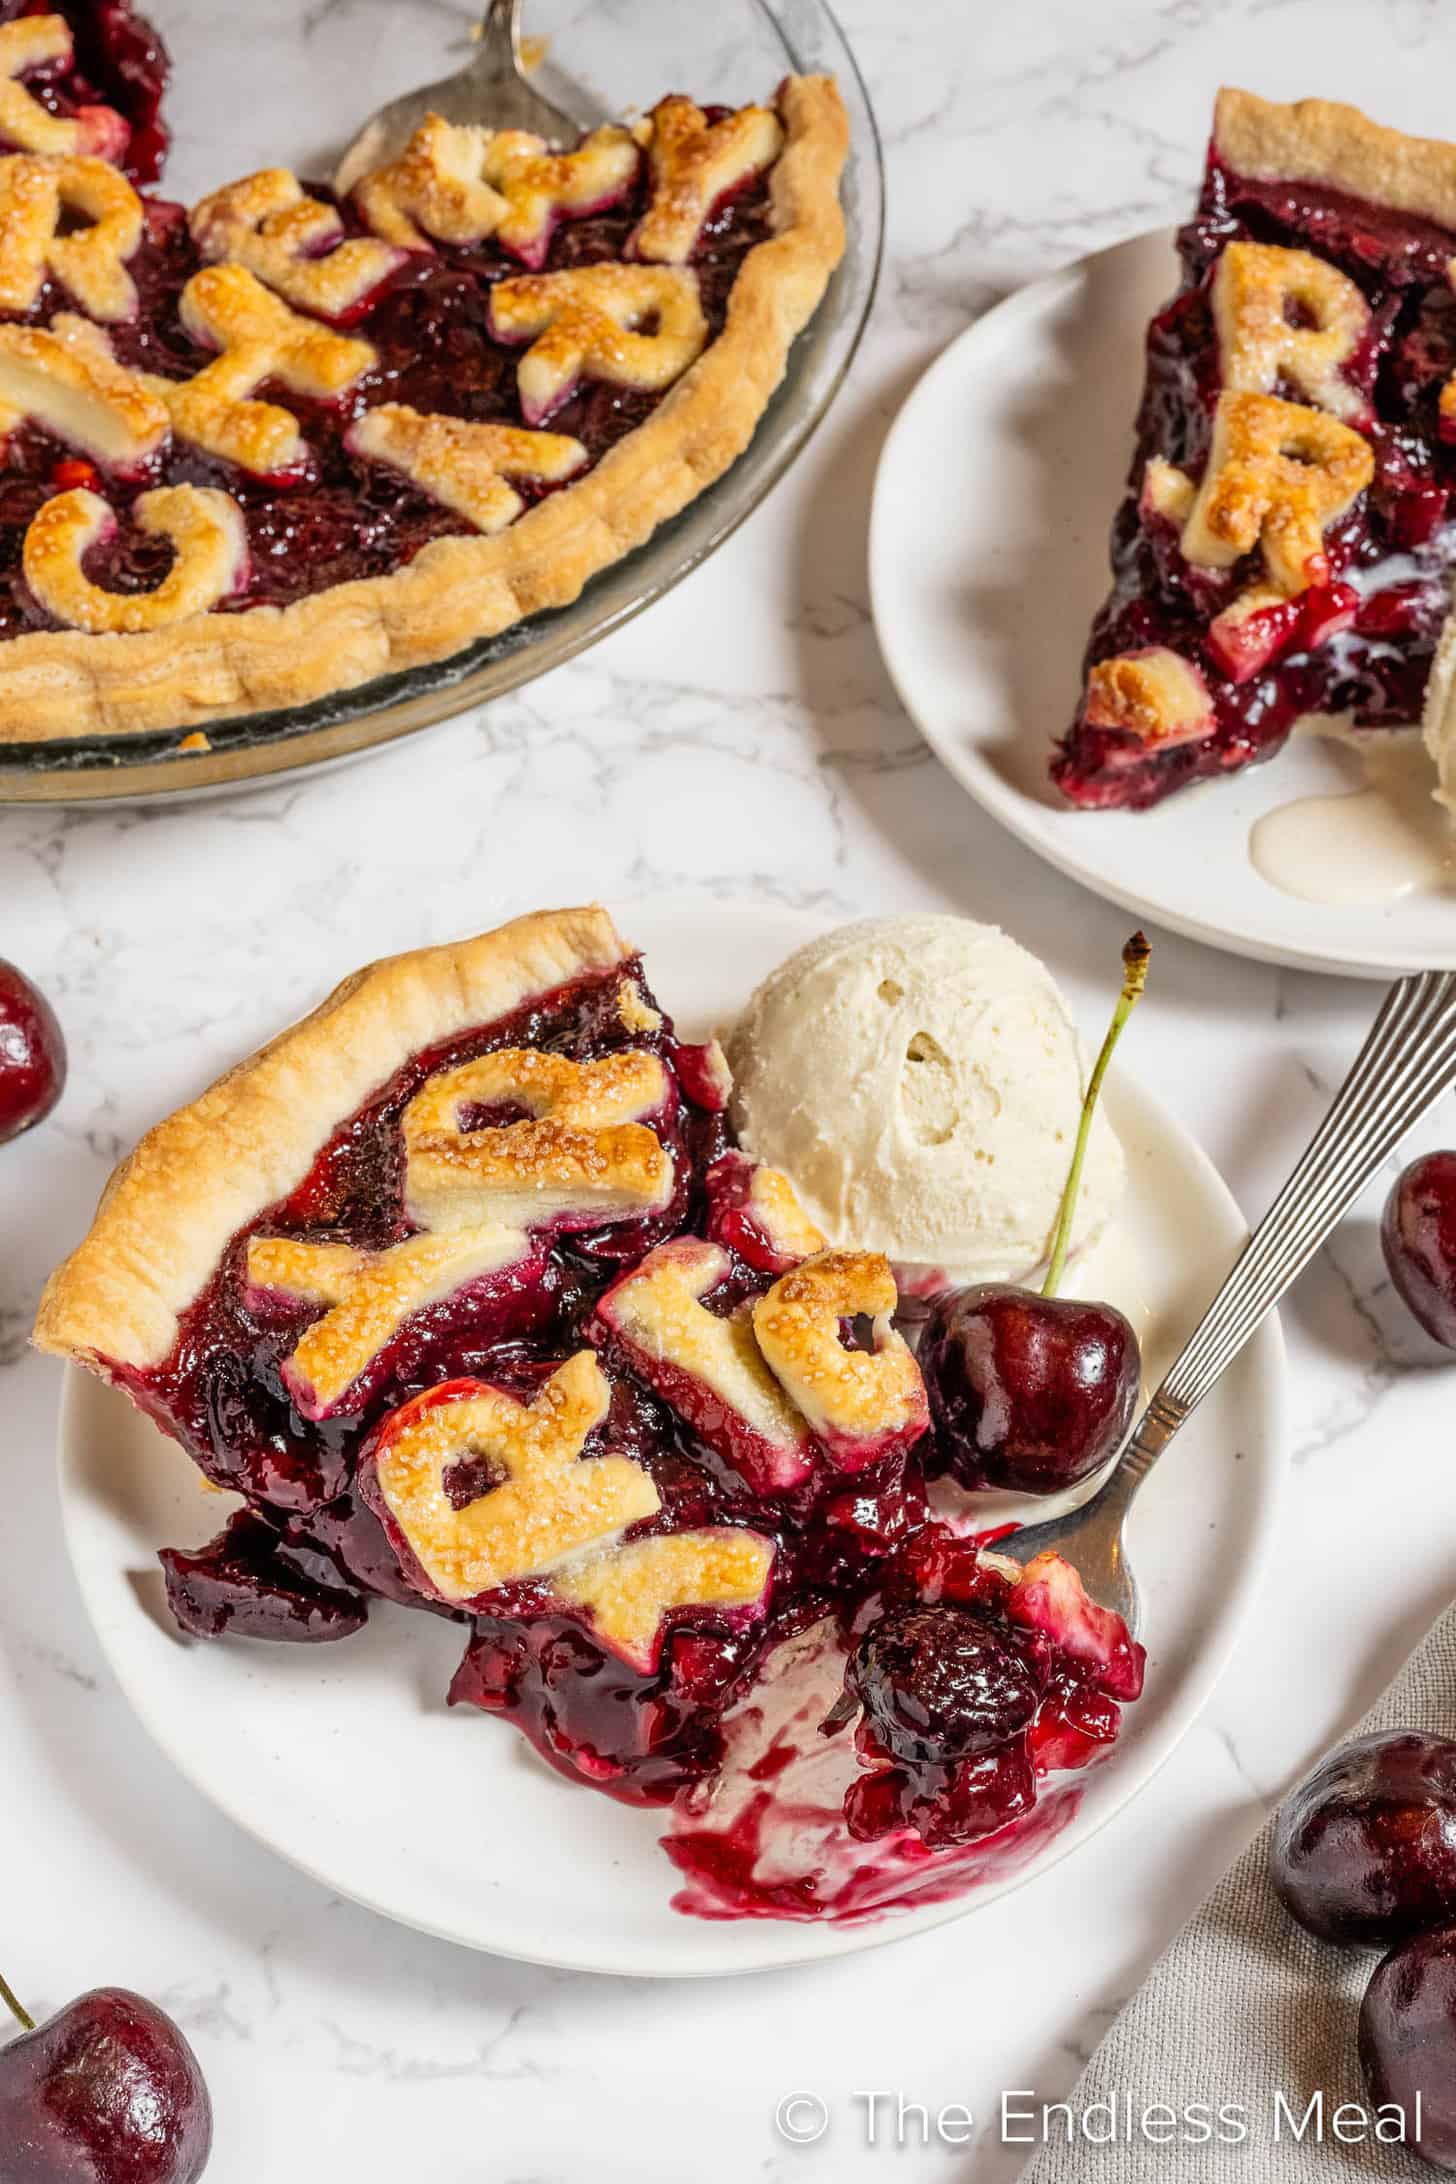
- When you remove the pie from the oven, it needs to cool. This is the hardest part! Let it cool for 3 hours before cutting into the pie. If you go in too soon it’ll be runny instead of that wonderful gooey center we know and love.
- If you don’t want to make your own crust but you still want to have the best crust ever, check to see if your local bakery sells frozen pie crust. They often do and it tastes better than what you’ll find in the freezer section of most grocery stores.
Should I use tart or sweet cherries?
This recipe was tested using Bing cherries, a popular sweet cherry variety. If you use tart or sour cherries (often called “pie cherries”), you may want to increase the sugar. Do this after you boil the cherries and add to taste.
Storage and freezing instructions
Store: You can store leftover pie in the pie dish and cover it tightly with aluminum foil or a reusable wax cover. You can also slice it up and store it in airtight containers. It will keep on the counter for 4 days.
Freeze: You can either freeze this pie whole or in slices. Either way, wrap it tightly with wax paper or parchment paper, then transfer it to a freezer bag. It will keep in the freezer for at least 3 months.
Homemade Cherry Pie Recipe
Ingredients
- 2 lb cherries (washed, stems removed and pitted)
- 1 cup granulated sugar
- ⅓ cup cornstarch
- 1 tablespoon amaretto (or vanilla)
- 1 double pie crust (homemade or storebought)
- 1 large egg + a splash of water (optional)
Instructions
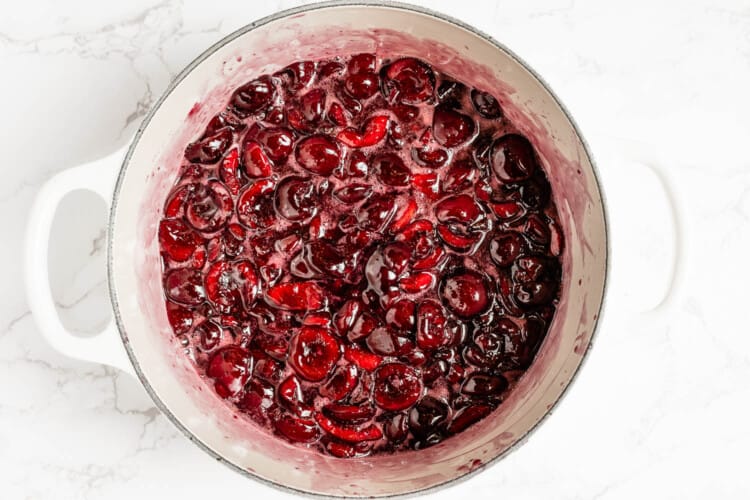
- Preheat your oven to 400 degrees Fahrenheit. Pit the cherries and then cut half of them in half and cut the other half into quarters. Add the cherries, sugar, cornstarch, and amaretto or vanilla to a pot and mix well. Let the cherries sit for 10 minutes so their juices release and then bring the pot to a boil just until the cherries thicken. Set aside while you roll the dough.2 lb cherries, 1 cup granulated sugar, ⅓ cup cornstarch, 1 tablespoon amaretto

- Roll the pie dough until it is ⅛ inch thick and about 2 inches larger than your pie pan. Transfer the dough to your pie pan and gently press it into the pan. Trim and crimp the edges of the pie and poke a few holes in the bottom with a fork. Put the pie into the fridge.1 double pie crust
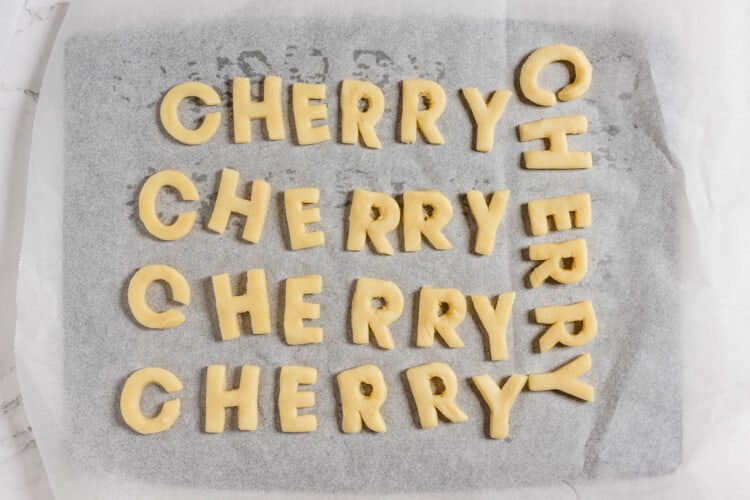
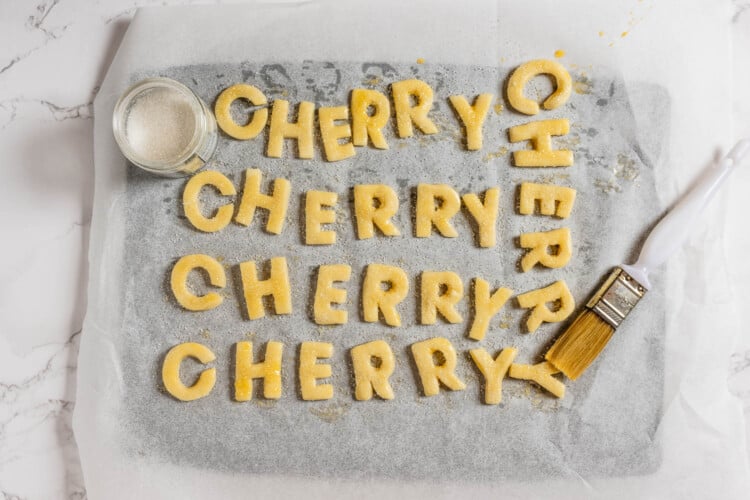
- Roll the remaining pie dough until it is ⅛ inch thick. Use alphabet cookie cutters to cut the letters to spell the word cherry several times. (You can also roll the dough into a circle to cover the top of the pie completely if you prefer.)
- Whisk the egg with a small splash of water and brush some of it over the letters. (Save the rest to make scrambled eggs tomorrow morning.) Sprinkle some sugar over the letters.1 large egg + a splash of water
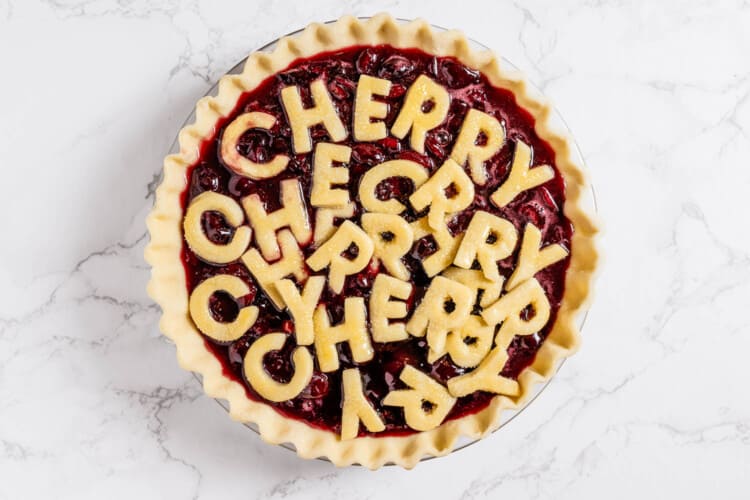
- Pour the cherry pie filling into the pie crust and then arrange the letters over the top.
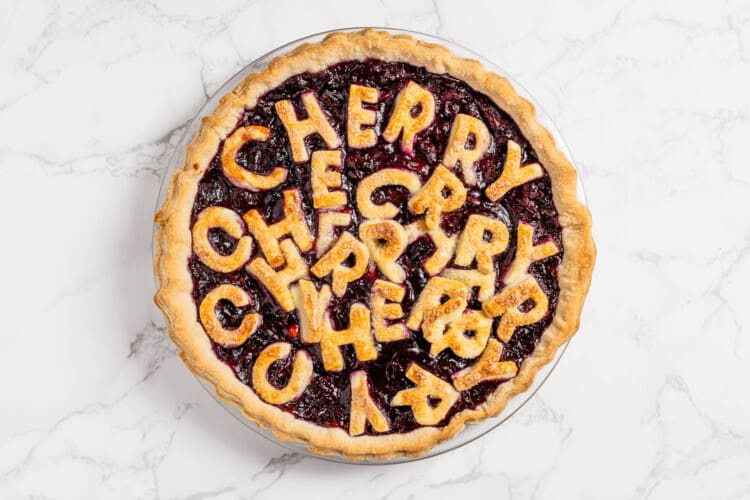
- Bake the pie for 15 minutes then reduce the heat to 350 degrees Fahrenheit and continue to bake the pie for another 35-45 minutes, until the crust is golden and the cherries are bubbling. RECOMMENDED: put a pie shield on the crust after the first 15 minutes of baking so that the edges don't get too brown. Remove the pie from the oven and let it cool for at least 3 hours before you cut into it. (It's hard to wait but the pie will be runny if you don't let it cool properly.)

Video
Notes
Nutrition
We have thoroughly tested this recipe for accuracy. However, individual results may vary. See our full recipe disclosure here.


Any ideas of how I can make a Cherry pie filling with jarred morello cherries?
I think you could use them, but you will want to drain them first. Also, if they are sweetened, you’ll want to reduce the sugar.
This was really good. I am going to have to make this again the next time that I have a pie craving.
This was amazingly good, my step mother makes homemade cherry pies; I plan on sending her this recipe to make on special occasions. 🙂
Good stuff.
Keep it up!
oh my! this was wonderful. i love the crust!
Wow, very good pie, I just make it and it is DELICIOUS! Perfect recipe 🙂
Thanks so much, Sanja!