Mom’s Nanaimo Bars – Our Authentic Canadian Dessert
This post may contain affiliate links. Please read our disclosure policy.
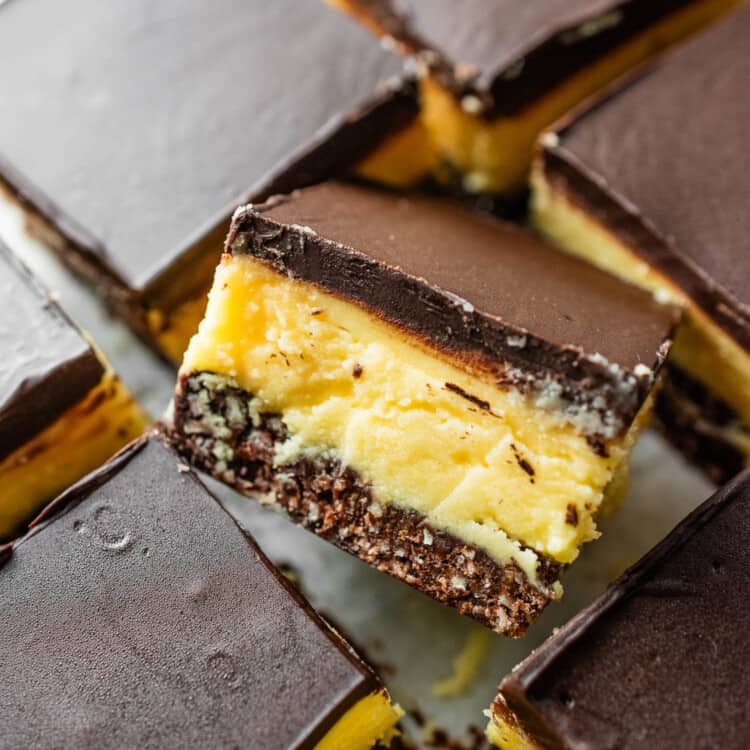
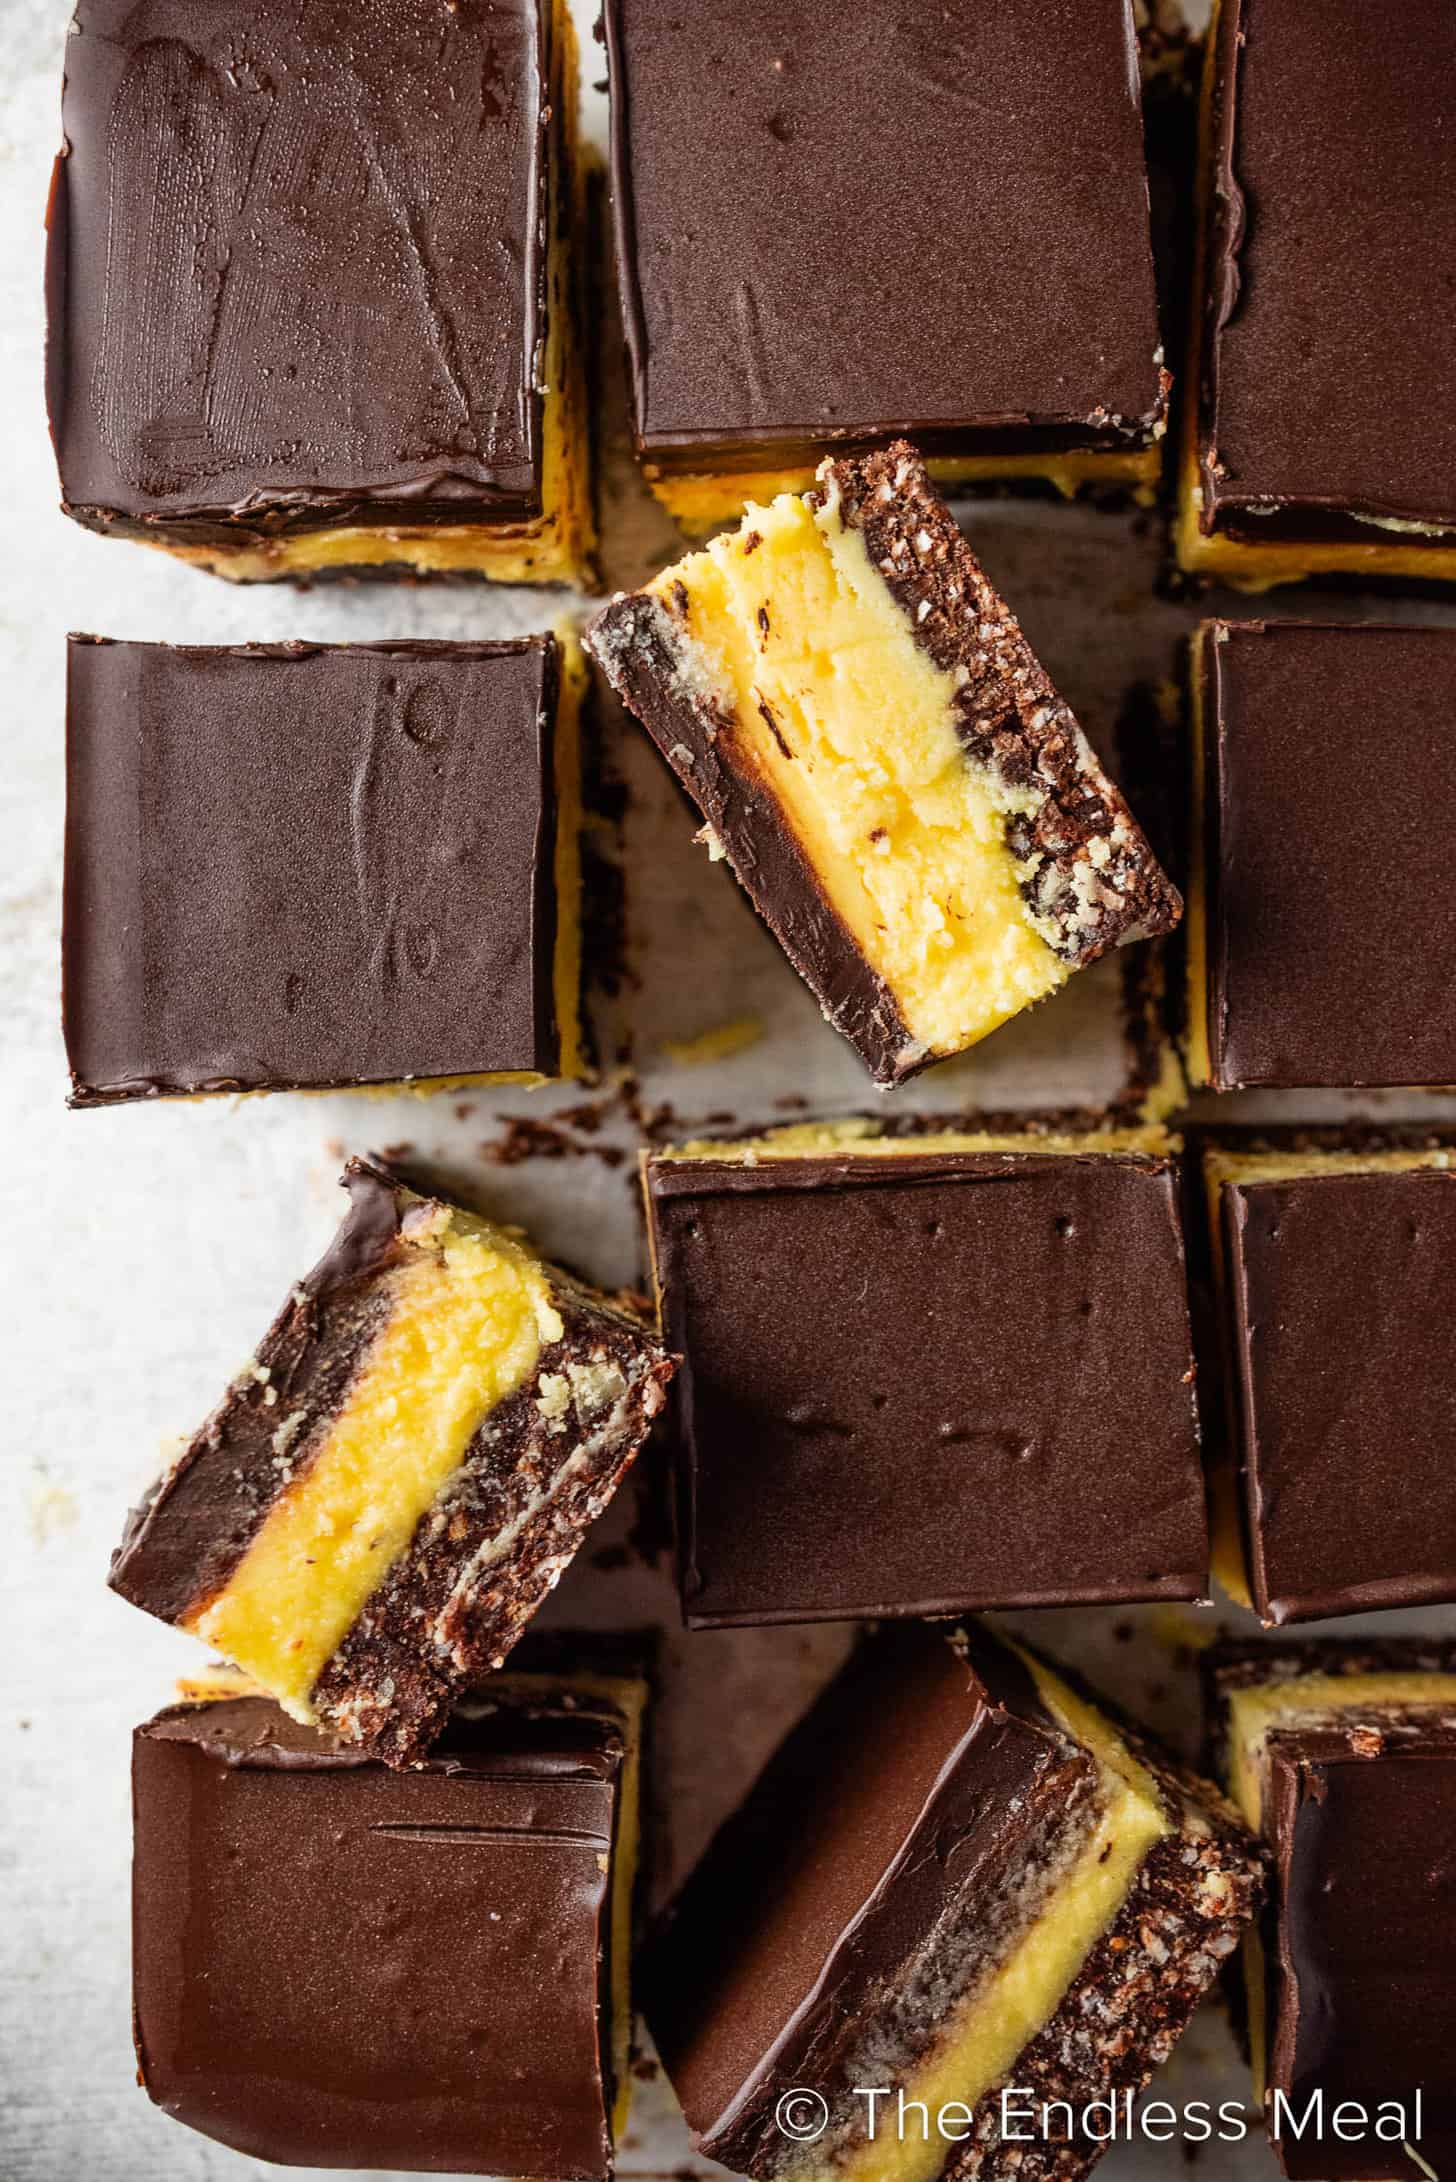
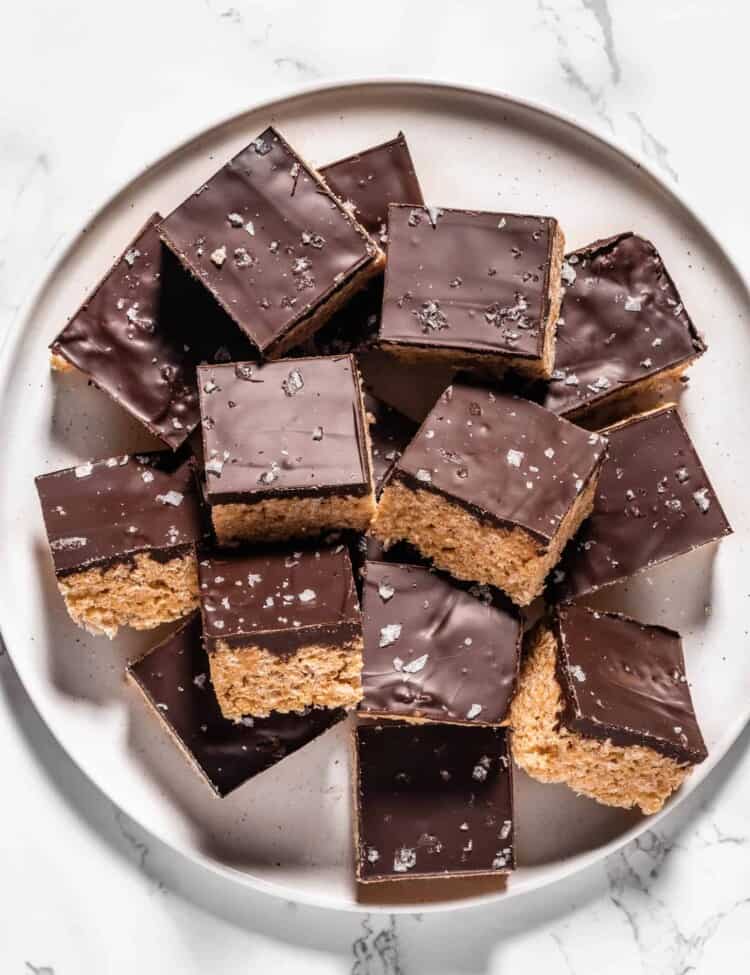
Nanaimo bars are a classic Canadian dessert. This is Mom’s recipe, and it is a bit less sweet than most, which is a good thing! They are made with a graham-crumb, coconut, and nut crust, topped with a layer of buttery custard, and finished with chocolate. You’ll love this no-bake dessert!
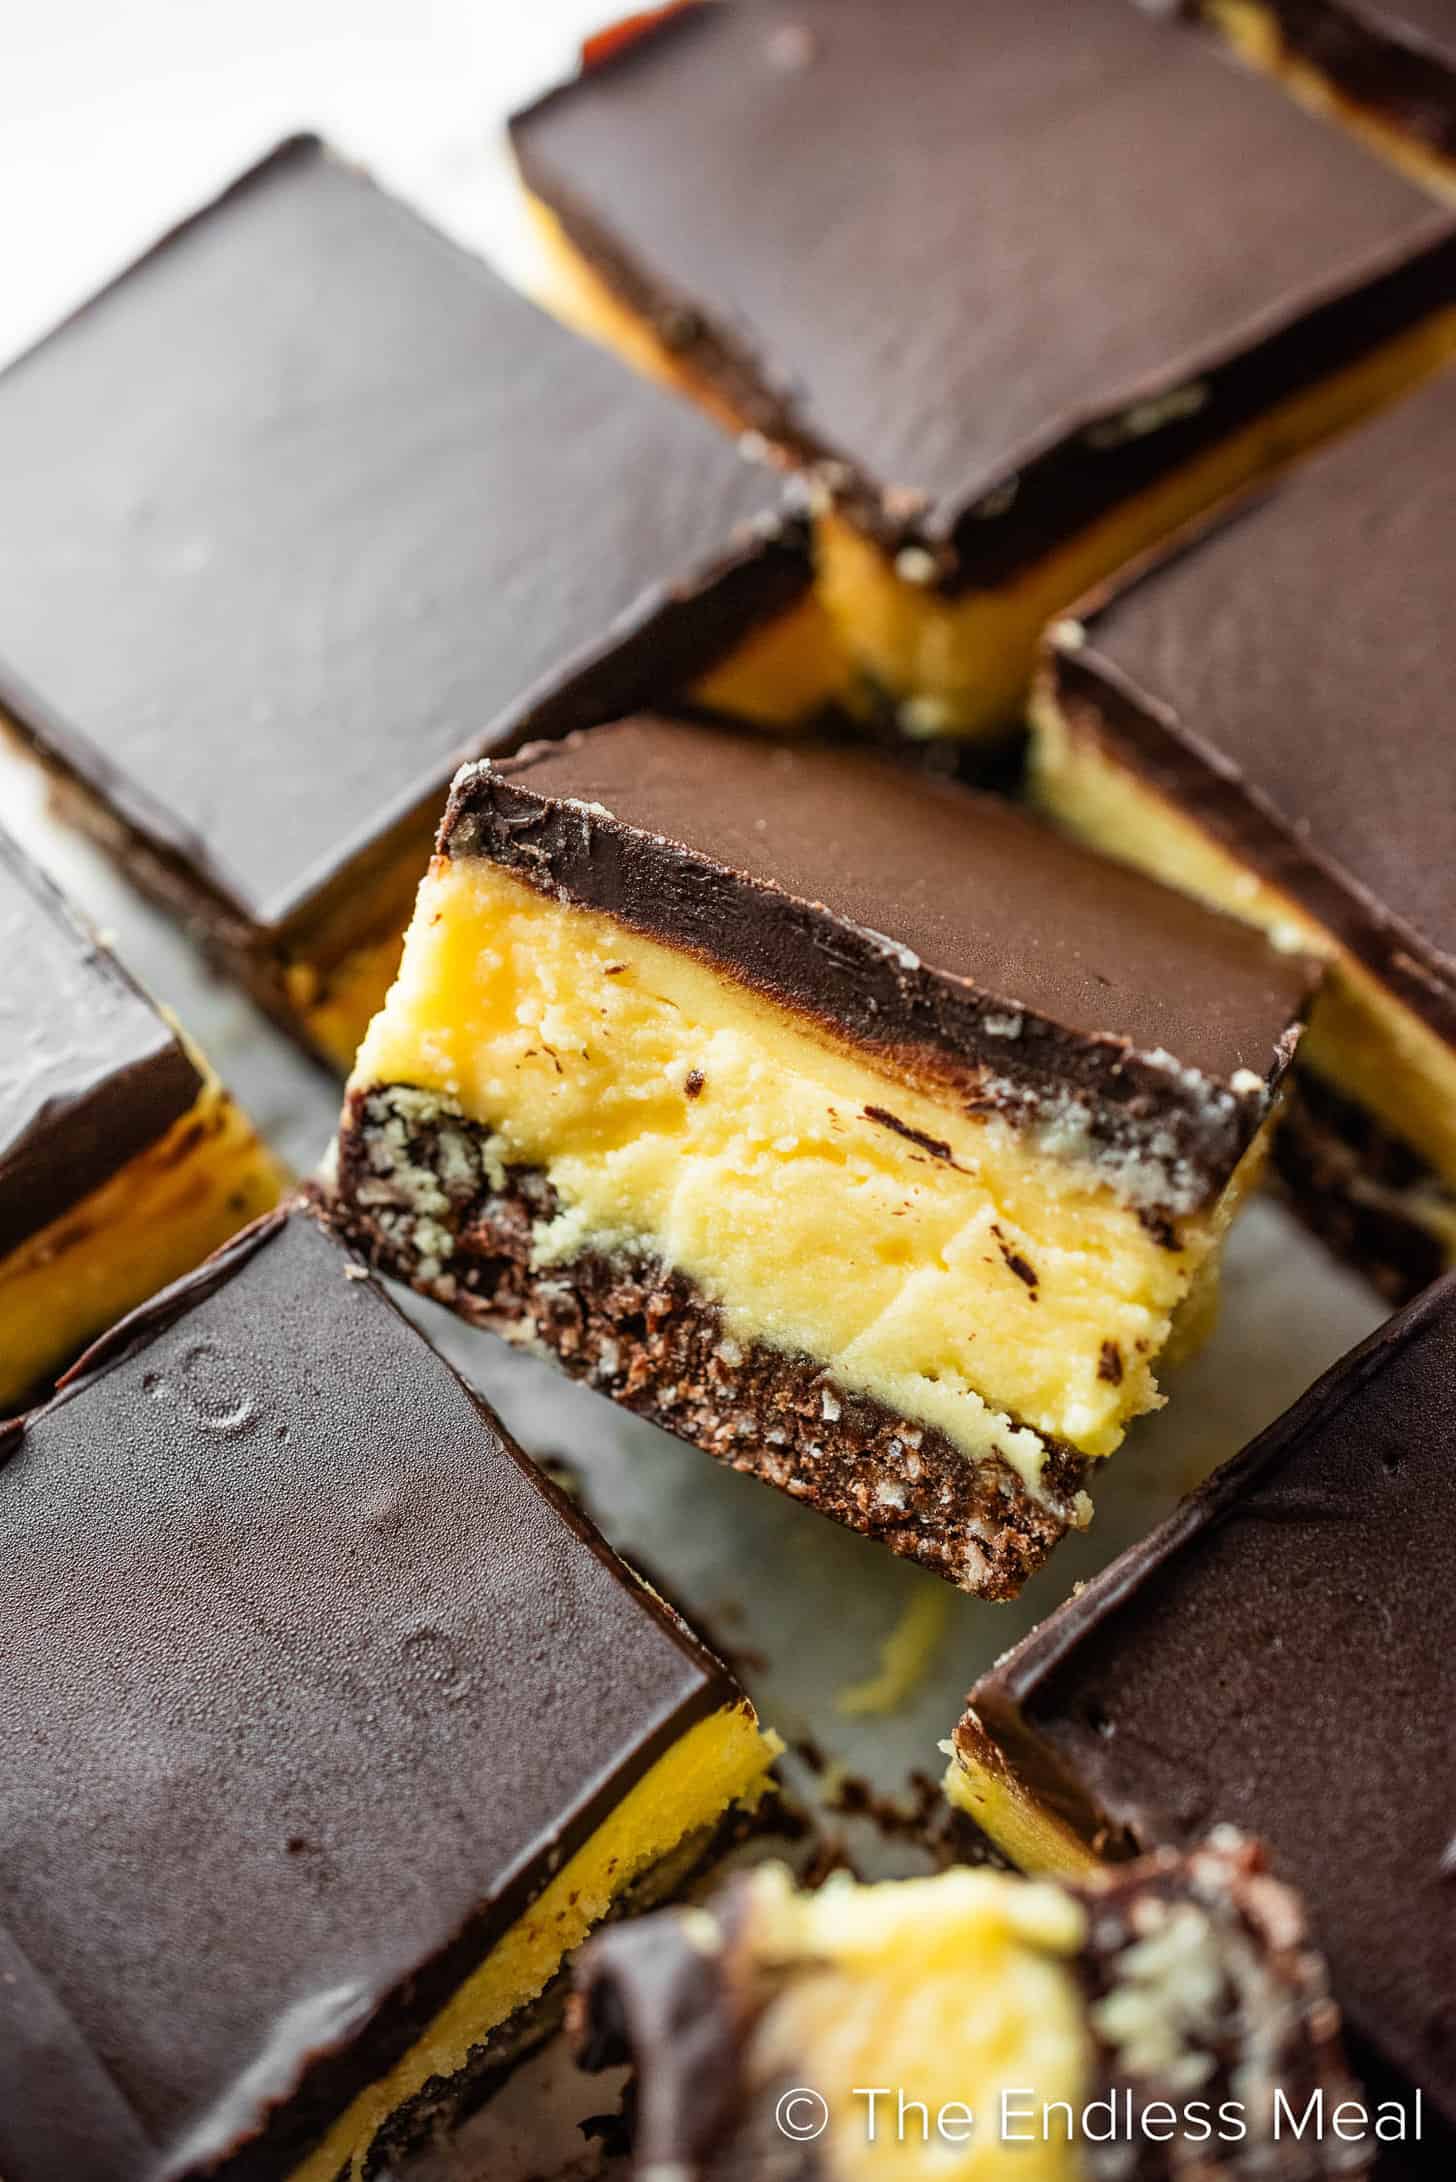
It’s no surprise that Nanaimo bars hold a special place in my heart. As a Canadian, I’ve eaten my fair share over the years, and I can confidently say that nothing compares to a homemade Nanaimo bar. With their chocolate-coconut base, creamy custard filling, and glossy chocolate topping, they’re one of Canada’s most iconic desserts for good reason.
This recipe comes from my mom, and it’s the one I come back to every holiday season, potluck, and family gathering. The layers are perfectly balanced, the custard filling is silky and rich, and the texture is exactly what a Nanaimo bar should be. In my opinion, they’re miles better than the pre-made versions you’ll find in bakery cases around British Columbia.
If you’ve never made authentic Nanaimo bars before, don’t worry. The ingredients are simple, the steps are straightforward, and the results are absolutely worth it. Once you’ve tasted a homemade Nanaimo bar with real custard powder and that classic chewy-crunchy base, it’s hard to go back.
The ingredients are classic and traditional. Cocoa powder, graham cracker crumbs, coconut, and walnuts create the signature base, while powdered sugar, butter, and Bird’s Custard Powder make the creamy middle layer. A simple mixture of chocolate and butter finishes everything off with the glossy topping that makes Nanaimo bars instantly recognizable.
What is a Nanaimo bar?
A Nanaimo bar is one of my favorite classic Canadian desserts. While it’s spread all over Canada, it originated in the city of Nanaimo on Vancouver Island in British Columbia—just a hop away from The Endless Meal headquarters! These no-bake tasty treats are made by layering three distinct tiers: a crumbly base, a creamy custard middle, and a chocolate topping. The result is like a layered bar cookie. They are loved year-round and hold a special place as a festive-season staple in Canada.
Tips for making the best Nanaimo bars
Nanaimo bars are surprisingly easy to make, but a few simple tips will help ensure perfect layers every time:
- Line the pan: Parchment paper makes it easy to lift the bars out for clean slicing.
- Use softened butter: For the custard layer, make sure your butter is at room temperature so it blends smoothly.
- Keep the layers even: Press the base down firmly, smooth the custard layer with a spatula, and gently tap the pan after adding the chocolate topping to level it out.
- Chill between layers: Let each layer set before adding the next so they stay distinct.
- Melt the chocolate gently: Chocolate can be finicky, so melt it slowly with the butter over low heat.
- Slice while the chocolate is just set: This helps prevent cracking. For the cleanest cuts, dip a sharp knife in hot water and slice rather than pressing straight down.
Store and freeze
How do I store Nanaimo bars? Place these in a covered container on your counter for several days or in your fridge for up to a week.
Can you freeze Nanaimo bars? Yes – store in the freezer in an airtight container for up to three months. To thaw, put them in the fridge overnight. Or simply let one sit on your counter for about 10 minutes – they don’t take long to thaw!
Mom’s Nanaimo Bars Recipe
Ingredients
Bottom Layer
- ½ cup butter
- 5 tablespoons cocoa powder
- ¼ cup granulated sugar
- 1 large egg
- 1 ¾ cup Graham cracker crumbs
- ¾ cup fine coconut
- ¼ cup chopped walnuts
Middle Layer
- 3 cups powdered sugar
- ¾ cup butter (softened)
- ¼ cup milk
- ¼ cup Bird's vanilla custard powder
Top Layer
- 8 ounces shaved dark chocolate or chocolate chips
- 4 tablespoons butter
Instructions
Bottom layer
- Lay a piece of parchment paper in a 9×11-inch pan, letting some hang over the sides. (This makes it easier to remove the Nanaimo bars.)
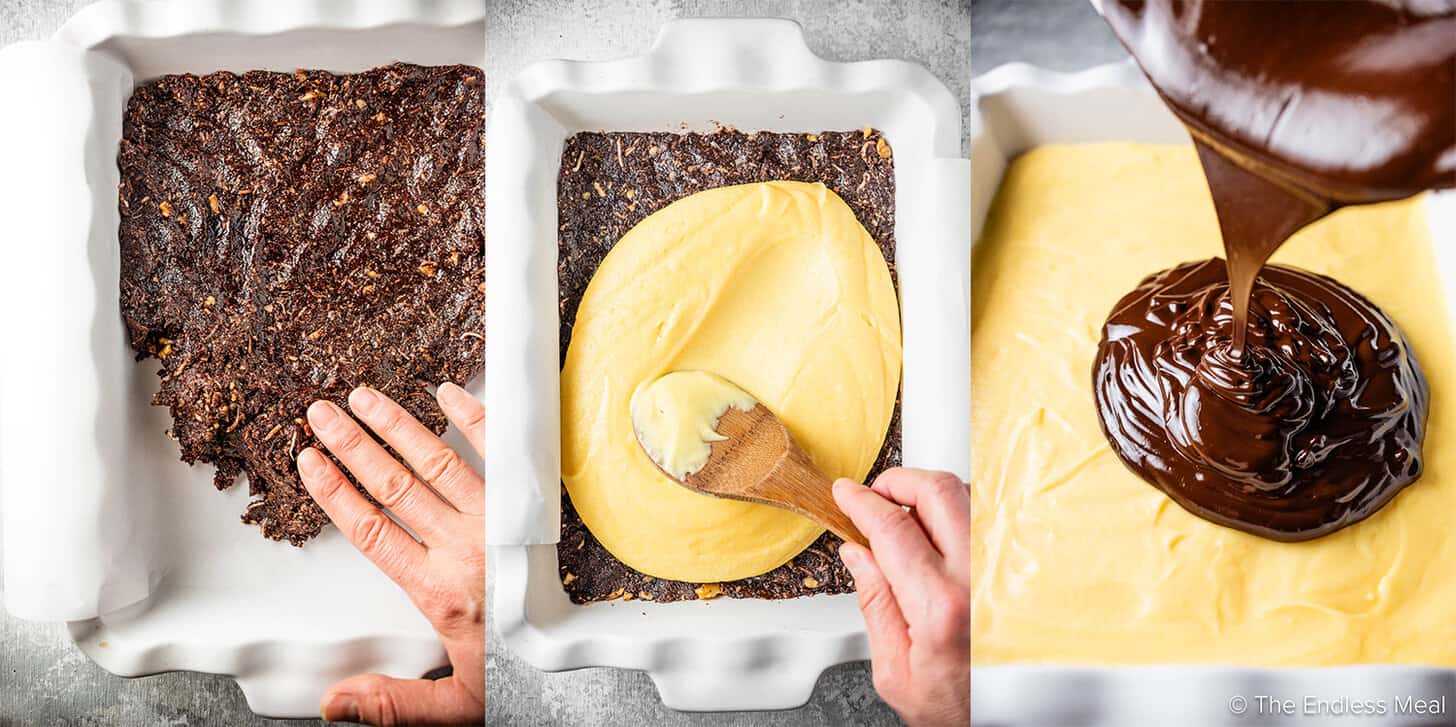
- Melt the butter in a medium-sized pot over medium heat. Whisk in the cocoa powder and sugar. Remove the pot from the heat then add the egg and whisk until it has thickened, about 30 seconds. Stir in the Graham cracker crumbs, coconut, and walnuts. Press the crust firmly into the prepared pan.½ cup butter, 5 tablespoons cocoa powder, ¼ cup granulated sugar, 1 large egg, 1 ¾ cup Graham cracker crumbs, ¾ cup fine coconut, ¼ cup chopped walnuts
Middle layer
- Add all the middle layer ingredients to a large bowl and cream them together using electric beaters. Pour the custard over the first layer and smooth the top.3 cups powdered sugar, ¾ cup butter, ¼ cup milk, ¼ cup Bird's vanilla custard powder
- Place the pan into your fridge for at least 20 minutes, or until the custard is firm.
Top layer
- Add the chocolate and butter to a medium-sized pan over low heat and let both melt. Whisk to combine and then pour the chocolate over the custard. Smooth the top first with a spatula then by gently tapping the pan on your counter.8 ounces shaved dark chocolate or chocolate chips, 4 tablespoons butter
- Chill in your fridge for about 20 minutes, or until the chocolate is soft-set. Cut the Nanaimo bars into bars then place them back in your fridge until they are completely set. (Cutting the bars first prevents the chocolate from cracking.)
- Store the bars in a covered container in your fridge for a week or up to three months in your freezer. The bars can be eaten cold or at room temperature – they take about 10 minutes to warm once out of the fridge.
Video
Nutrition
We have thoroughly tested this recipe for accuracy. However, individual results may vary. See our full recipe disclosure here.


Perfect recipe! And easy to make.
Thanks you!
You are so welcome!!
These taste just like the ones I ate growing up. I’m not sure why they loomed so large in my mind…. maybe the three layers were intimidating, but it was super easy and yummy.
Thanks,
I’m so happy they were a hit!!!
Just like my Mom’s. Couldn’t find her recipe , THANKS
You are so welcome!!
I just made your recipe for the first time, as Nanaimo bars were something I grew up with in Vancouver BC, but now that I live in Halifax NS, I haven’t seen them.
My question is, I made the middle layer per your instructions, and double checked my measurements, but I found it quite a bit thicker than pictured. (there was no “pouring” it out of my kitchenaid’s bowl, I’d compare the consistency I had to what I would expect it to be once it’s “set” in the fridge.
What can I do to get the proper consistency?
Thanks!
I haven’t encountered that before but it sounds like you could simply add a little more milk. You definitely want the custard to be on the firmer side so it will set properly in the fridge!
I wanted to ask about the final step, the directions say 8 oz of chocolate or 2 1/2 cups chocolate chips (which is a lot more than 8 oz, I think) … how much do you typically use?
Good question! The last time I made the recipe I used 8 ounces of chocolate that I shaved from a brick, which ended up measuring just over 2 cups. I just weighed and measured some chocolate chips that were in my pantry and 8 ounces was just over a cup. 8 ounces is the correct measurement. 🙂
Hi!
I’m making this for a coffee morning on Oct 15th & some of the people have a nut allergy. I’ve managed to find nut-free chocolate but I can’t find nut-free cocoa powder. Could I use some melted chocolate in the base instead? If not, what do you suggest?
I’ve honestly never seen cocoa powder with nuts in it so it should be pretty easy to find. Hershey’s Cocoa Powder is a pretty widely available one and does not have any nuts. Be aware though that there are nuts in the base of this recipe. You could try substituting them with sunflower seeds. 🙂
I am hosting a quilt bee tomorrow and thought I would make them a Canadian treat. I can already tell just by licking the spoons that they are going to be awesome! Thanks for the great recipe!!
You are so welcome! I hope everyone loved them as much as I do!
My son has a nut allergy so I replaced the walnuts with chopped pumpkin seeds. Delicious!
That’s such a great idea! Thank you for letting us know how they turned out with pumpkin seeds. If I ever need to replace the nuts I’ll know what to use instead!
Kristen, these photos are sooooo beautiful! I have to admit, I’ve never had nanaimo, but they look delicious!
Thank you so much! They’re my fav treat this time of year. Totally worth indulging in!
I love to make these every Christmas. My daughter, however, cannot eat chocolate so I was wondering if substituting butterscotch morsals for the top layer would work. What do you think?
I’m so sorry I didn’t see your comment until now. I hope it is not too late! It would change it for sure, but I bet it would still be delicious!
This recipe is similar to my grandmothers (90 yrs old), but her secret ingredient was adding chopped dates to the first three ingredients in the sauce pan. This simple addition kept the base moist and the taste of graham wafers was balanced. Thanks for sharing.
Kristen hi I’m niall from Ireland living in Asia I used your recipe and I love it. But I wanna make the nanaimo bars for my friends who are asian and they think the middle layer is a tad too sweet. Any way to make it less sweet without reducing the volume or texture of the custard centre??? Thx for everything 🙂
Ni Niall!
I haven’t tried tinkering with the recipe, but I would think that if you reduced the icing sugar in the middle layer it should still work out great.
Let me know how it goes!
I have added cornstarch for some icing sugar to make it less sweet. 1/2 c – 3/4 c.
That is such a great idea to add chopped dates. I think I’ll try that next Christmas season for sure!
This is my mother’s recipe! Hers were called Flanagans Fancies. I will only eat these as I find that the storebought Nanaimo’s are way too sweet for me. They are a Christmas tradition, however, I have to hide them from my sons as they will eat them all if they can find them!
Wow, my mother and grandmother used to call these FLANAGAN’S FANCIES too!
Any idea where this name came from?
~~Brant
That’s awesome! The name comes from Nanaimo, a small town in BC where the first recipe was printed back in 1953. I love hearing all the different names that these bars have. Apparently they have quite a few different names. 🙂
I always thought that the name of ours came from the lady who gave us the recipe. Her name was,of course, Mrs. Flanagan. My father taught the Flanagan children in Toronto.
It probably did! There seems to be a number of different names for the recipe. Nanaimo Bars is the one I grew up calling it. 🙂
I love the name Flanagans Fancies! They’re still my favourite Christmas treat. Can’t imagine the holidays without them ?
Hahaha….I so remember coming home to finding your first attempt at these…still makes me laugh that you ate all of them!! Lv you, xo
Are these the same as M&M Meat’s naniamo bars? I used to be able to get them when I lived in Buffalo, NY but now I live in Las Vegas with my husband and we clearly can’t just drive over the boarder to grab a box!
Hey Erin,
I’ve never had naniamo bars from M&M Meats before. My hunch is that these would be similar, but better since homemade treats always taste better than store bought 🙂 Let me know if they taste the same as you remember!
It is “Nanaimo”
Love your site!
d
Thanks, dd!
What is custard powder?
Hi Dianne,
Custard powder is basically corn starch with a little flavouring added. You can buy it in the baking section of almost all grocery stores. The brand I use is Birds, but I’m sure all brands would work well.